• Welcome
  • About
  • Workshops
  • FOOD FOR BLOG
  • Contact
Menu

The Cultural Kitchen

Street Address
City, State, Zip
Phone Number
COOKING CLASSES ON DEMAND

Your Custom Text Here

The Cultural Kitchen

  • Welcome
  • About
  • Workshops
  • FOOD FOR BLOG
  • Contact
Brushes Mercado-1.jpg

FOOD FOR BLOG

In the vast world of Antojitos, the Gordita de Manteca stands out.

April 25, 2020 Maria Garza

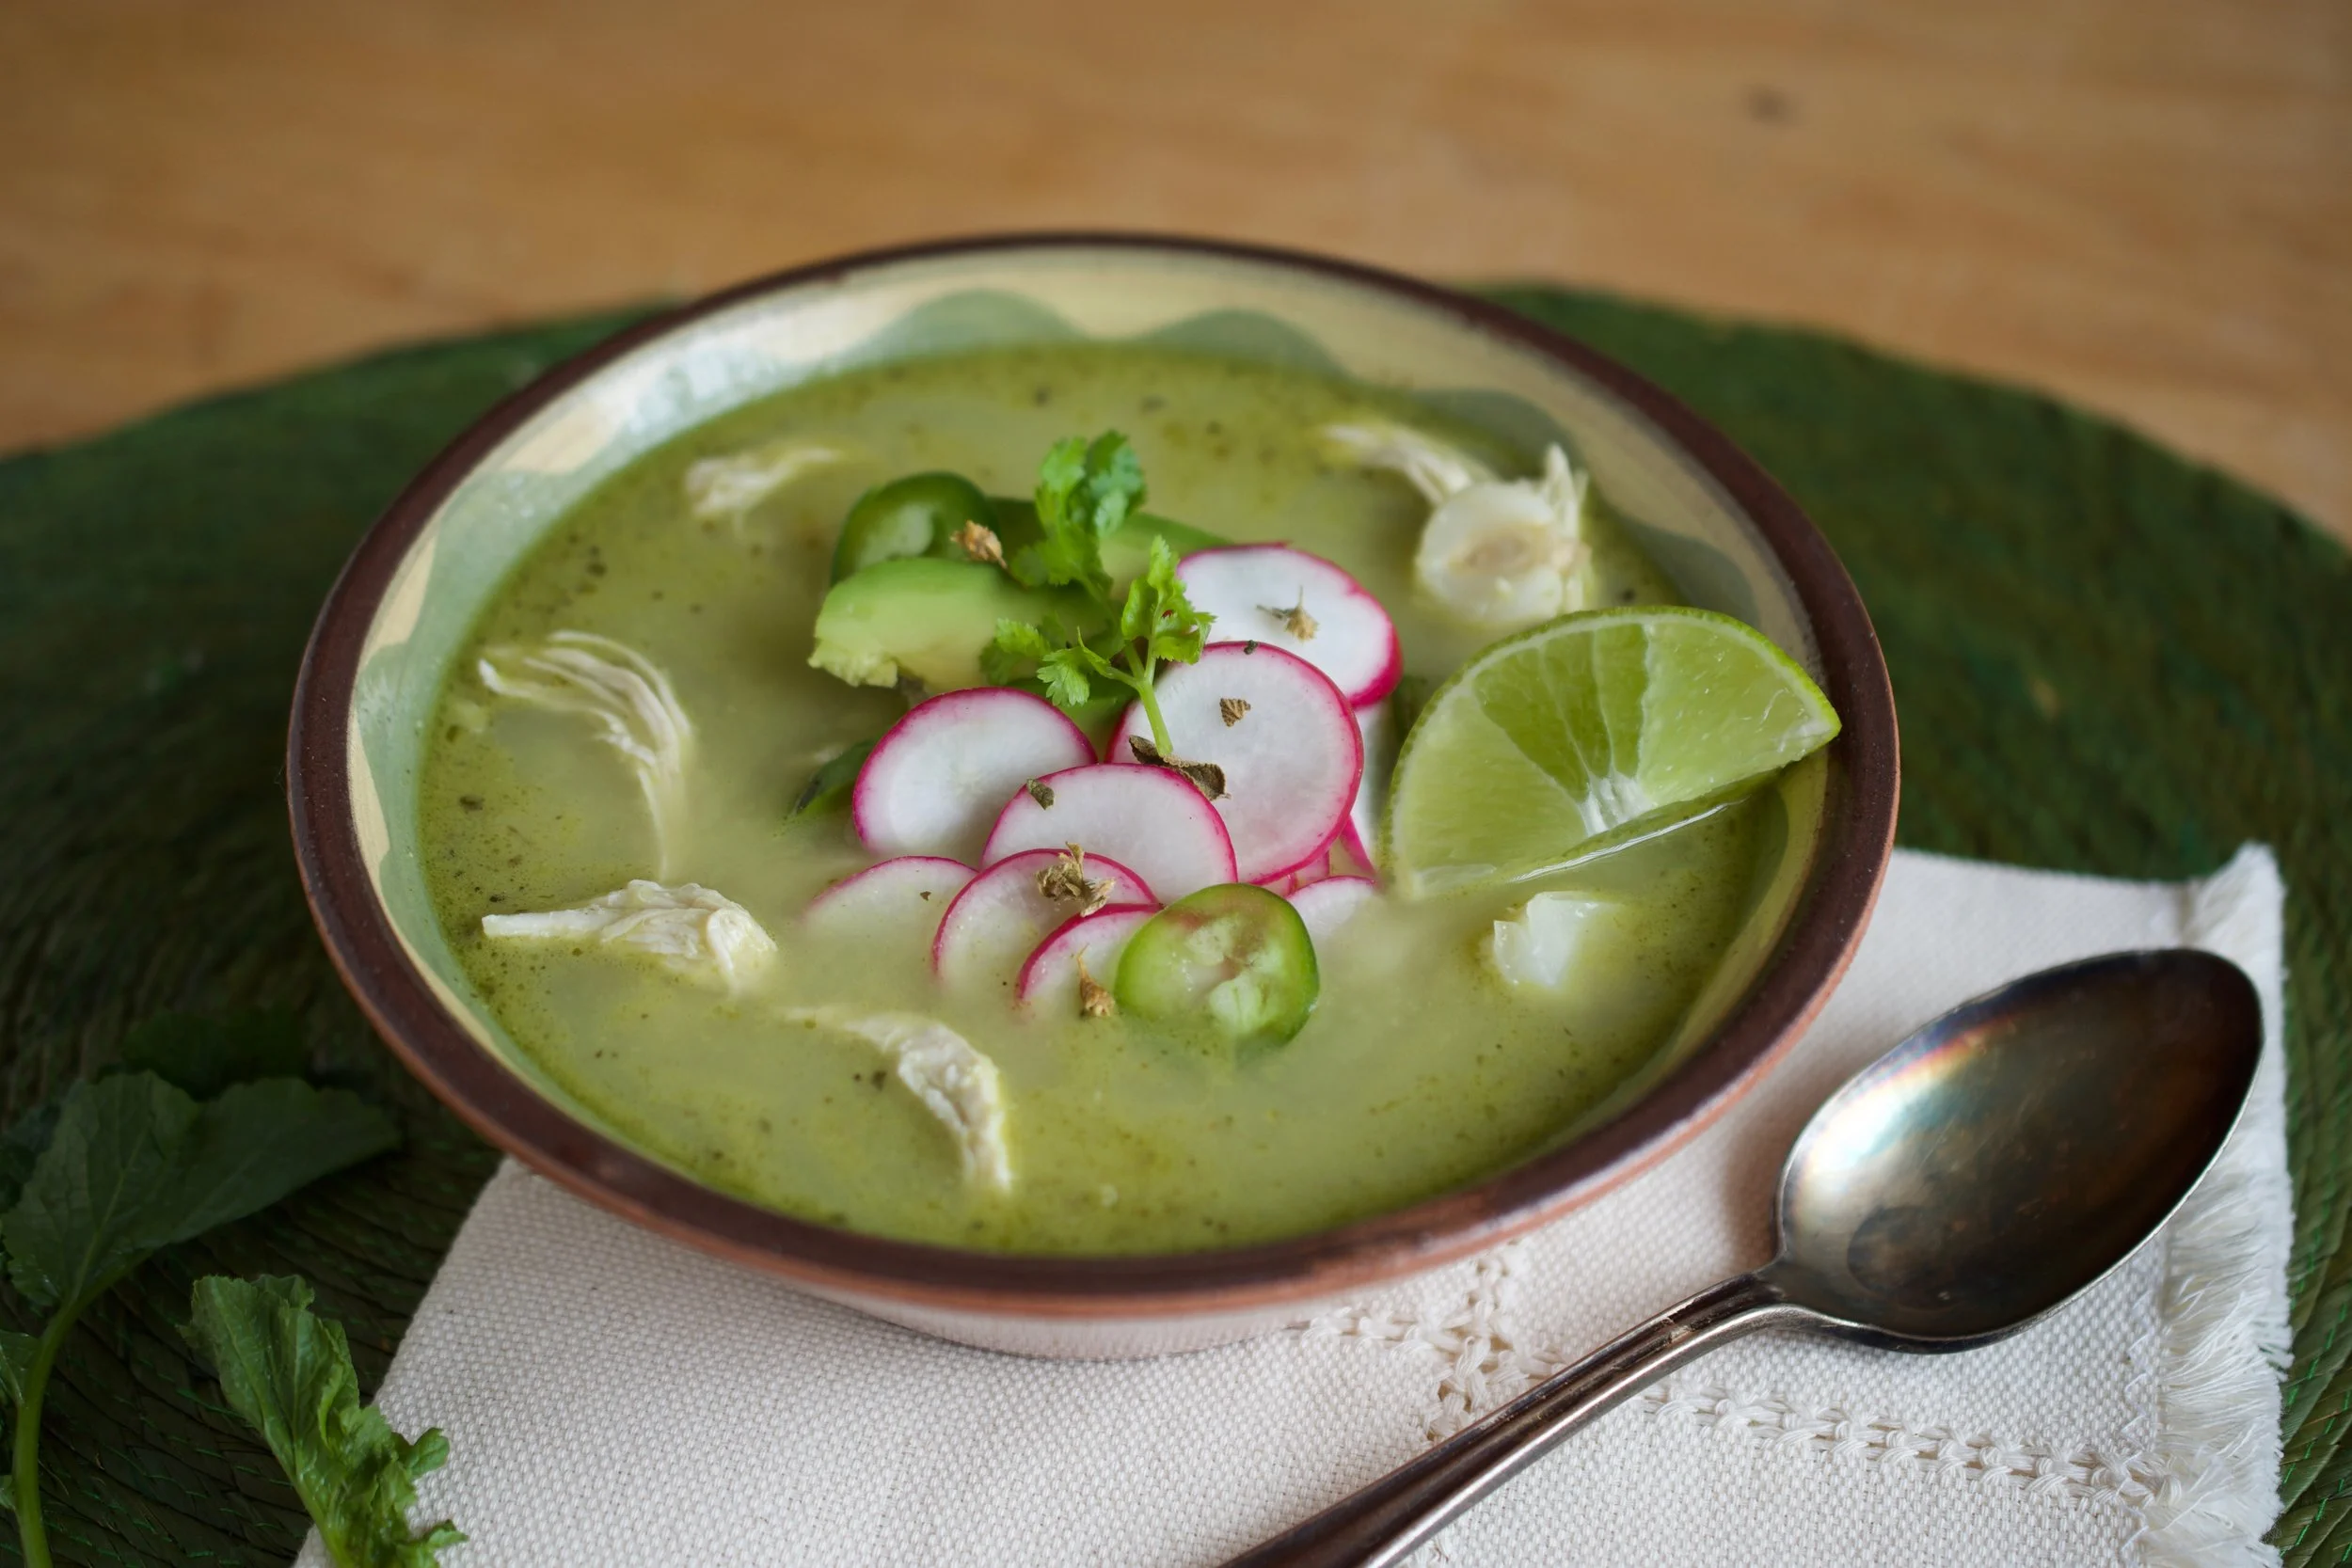
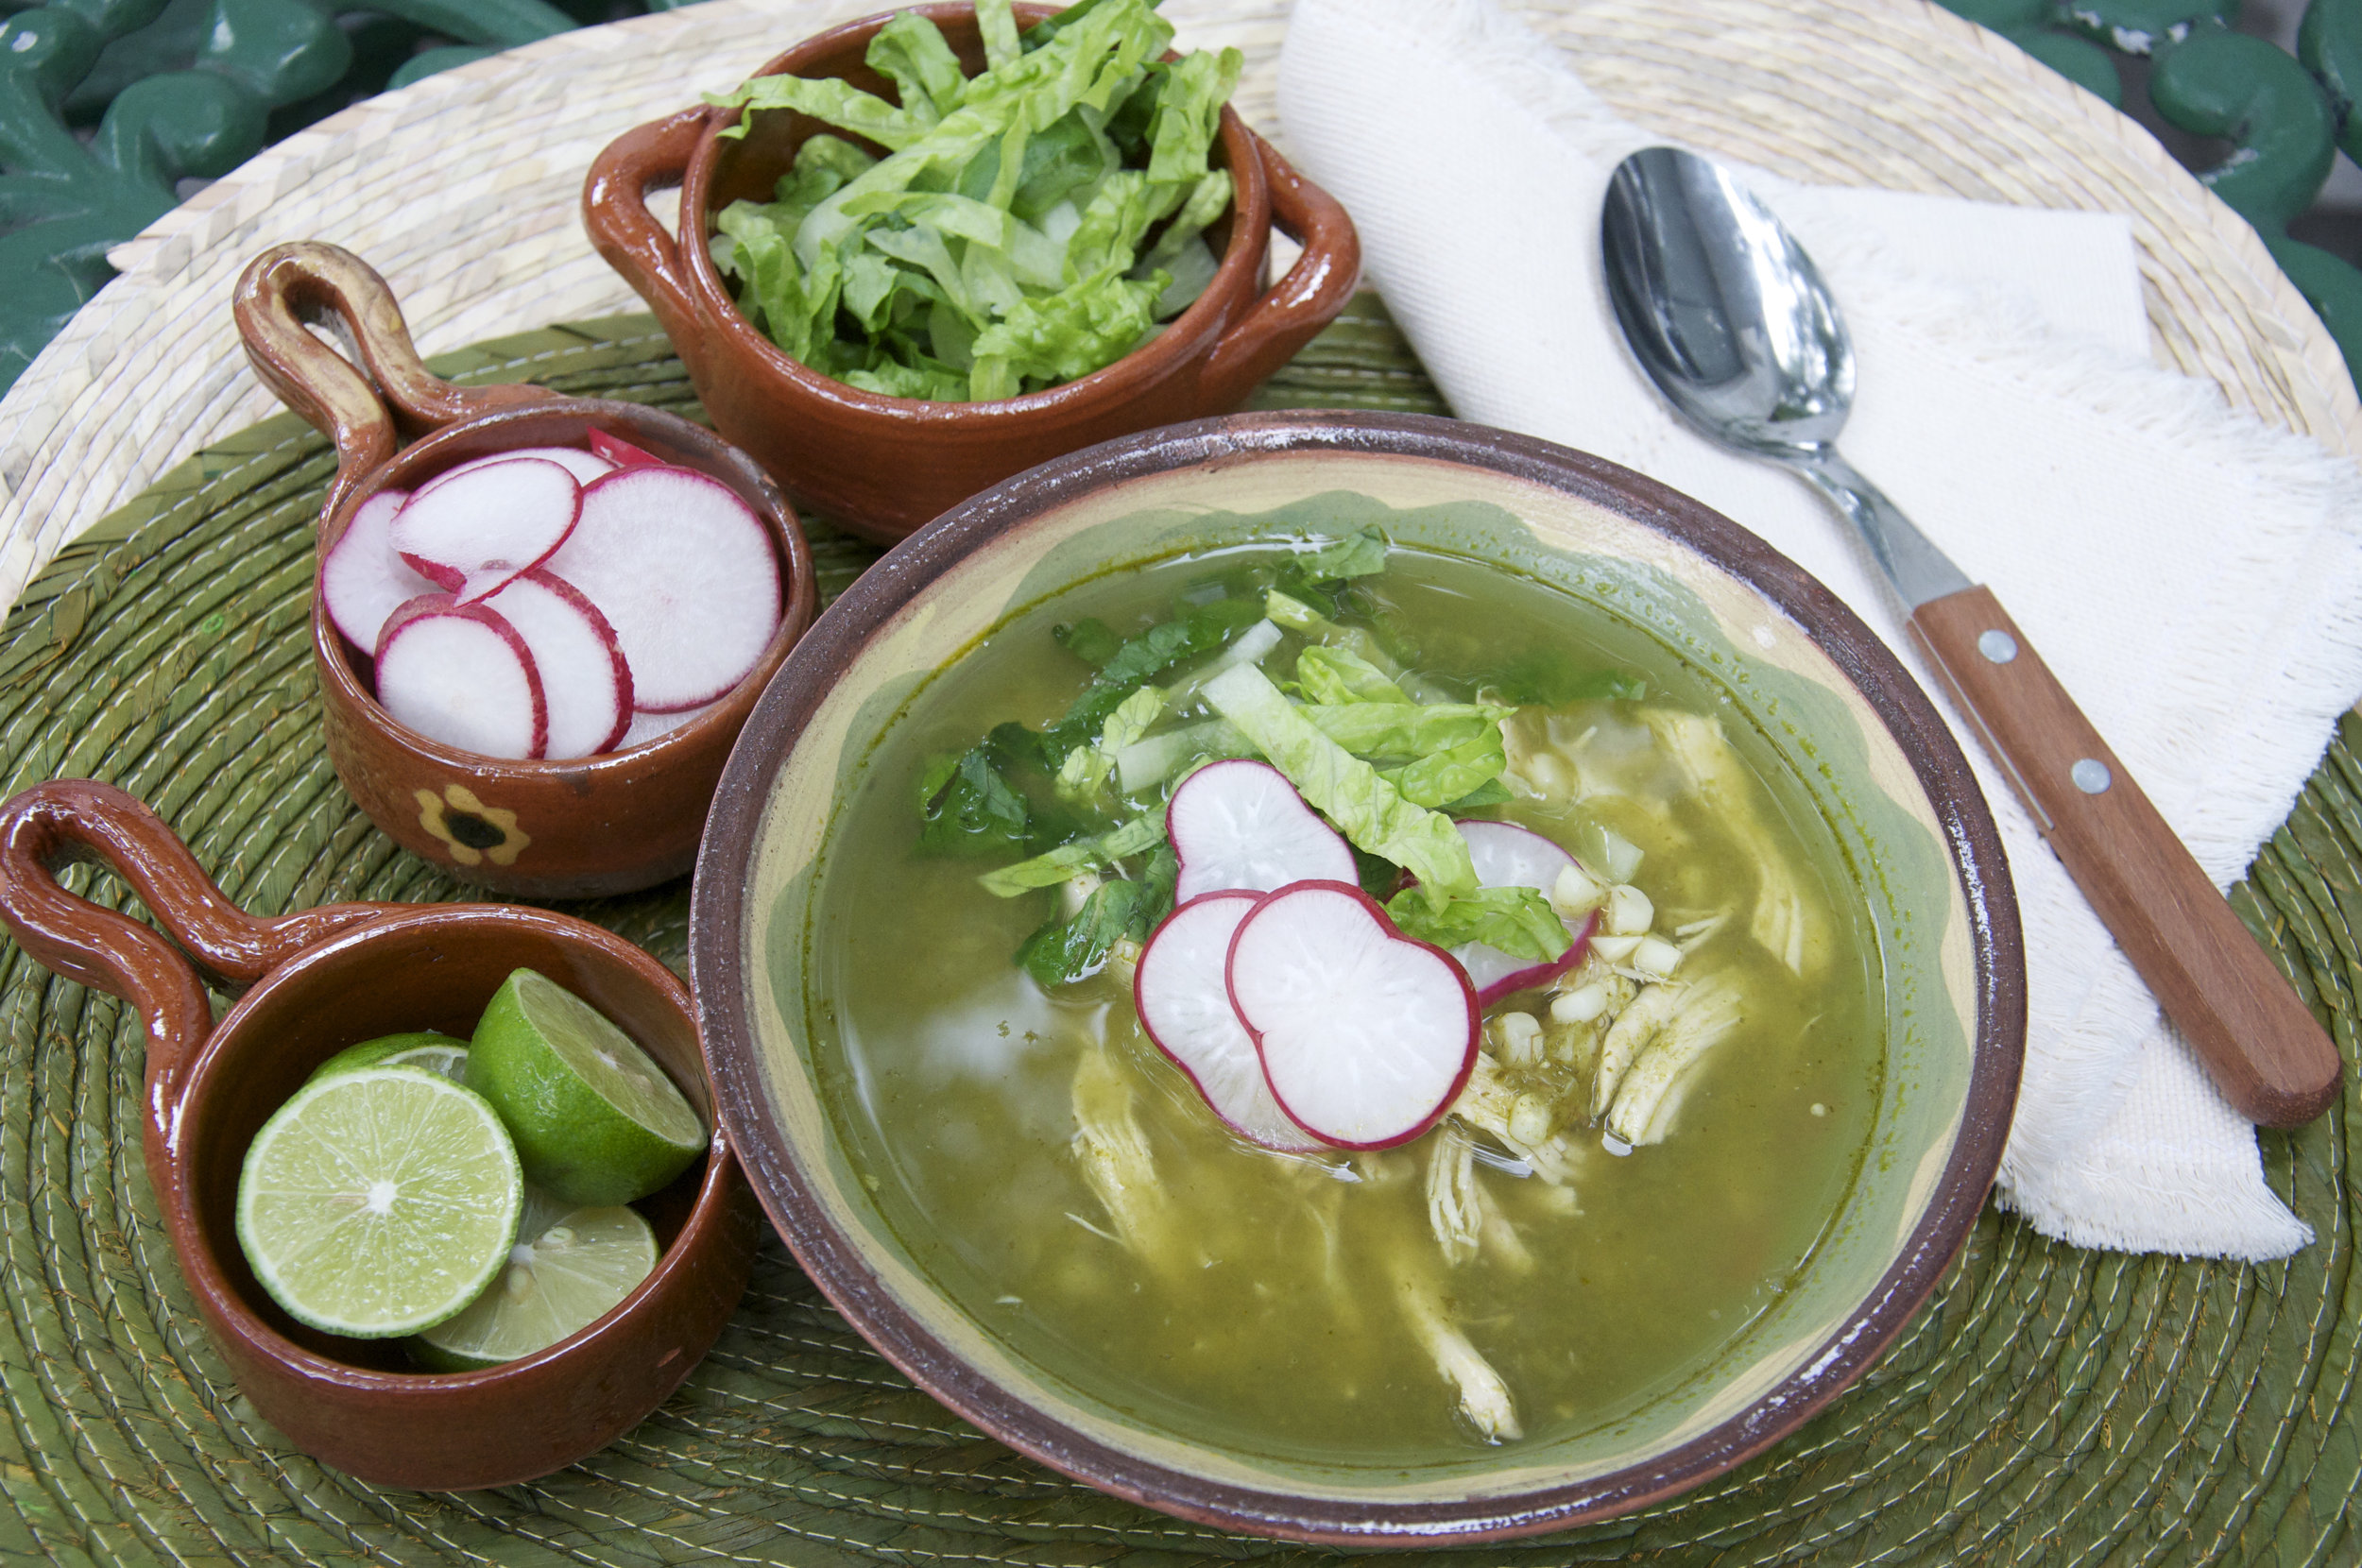
There is a world of Antojitos in the Mexican cooking repertoire, and Gorditas are one of my  favourites… for obvious reasons! Like a warm, compact sandwich, a Gordita holds any number of fillings, ranging from the humblest refried beans, to scrambled eggs, to picadillo, to chicharrón  in green salsa (my favorite!).

From the first bite, you savour a rich corn dough flavoured with manteca - that porky-tasting lard Mexicans love. The filling is, of course, your choice, but that is what makes these Gorditas so much fun. They can be filled with breakfast, lunch or dinner items, though more often than not, Gorditas are eaten for lunch or dinner.

Gorditas are very similar to Venezuelan or Colombian Arepas, the difference being in the flour used. In Mexico we use nixtamalized masa, whereas in south America they used a corn flour that is coarser in texture. Technique is almost the same. Another cousin of the Gordita is the Salvadorean Pupusa, using the same masa as we do in Mexico, but pupusas are cooked with the filling inside from the beginning. All are delicious.

You can make Gorditas without lard, but in my opinion, the ones that do have lard in the mixture are infinitely better tasting, to say nothing of the texture of the dough, which is more moist and less likely to crumble and dry up. Some gorditas are cooked on the griddle and then fried, but that is every cook’s choice. This version is like the ones I have tried in the central State of Zacatecas, and they are delicious!

A filling of beans is all you need for these little guys, and a showy garnish of finely shredded cabbage, crumbled salty cotija cheese (or feta if you can’t find cotija) and pico de gallo, topped with a spicier salsa. I can guarantee these will fly off the plate! 

Gorditas de Masa Estilo Zacatecas
Masa Cakes Zacatecas Style

2 cups Maseca
1 tsp kosher salt
1 ½ cup hot water approx
¼ cup manteca (rendered lard)

1 cup refried beans
2 cups finely shredded cabbage or lettuce
1 cup crumbled cotija, fresh or feta cheese
2 cups pico de gallo 
1 cup spicy salsa

In medium bowl, place Maseca and mix in kosher salt. Start adding warm water, a bit at a time, as you work the dough, until you have a smooth dough that’s not too sticky. Add lard and work it into the dough.

Divide the dough into 8-12 portions, depending on the size you want your gorditas. Flatten them until they are 3/8” thick, making sure edges are nice and smooth.

Cook on pre-heated griddle about 3 minutes per side initially, and then turning every minute or so until they are nicely speckled. Remove and place on a tray and keep in a warm oven until all gorditas are cooked.

When ready to serve, split gorditas open and spread with refried beans. Top with pico de gallo, shredded cabbage and cheese. Finish off with a spicier salsa if desired. Serve warm.

Makes 8 gorditas.

4 Comments

A versatile and bright salad.

April 19, 2020 Maria Garza
Carrot Salad1.jpg

As the COVID-19 quarantine continues, our skills in the kitchen are not only about being creative but also about the ability to use everything without waste, while still creating recipes that are delicious and fun. Carrots are an amazing option because they are delicious, colourful, and nutritious, but they also last a long time in the crisper. Chances are, you have a bag sitting in your fridge right now.

I think carrots are an underappreciated vegetable, mostly left to appear as a simple side dish either boiled, steamed or mashed. Prepared like that, they are - in my opinion - a bit on the boring side.

A lot of the carrot salad recipes you see out there are made using mayonnaise or cream, and on the sweeter side including raisins, apples and/or pineapple. While there is absolutely nothing wrong with that flavour profile, I will always prefer sour, salty and spicy notes in my food. This carrot salad is exciting, fresh, and a snap to make, and it also keeps well if you need to make it a day or two in advance, making it a great addition to your lunch or dinner repertoire.

In preparing this salad, it’s the little details that make all the difference. Sure, you can shred the carrots on your box grater, but that will give you a slightly mushy salad. Instead, use a food processor with the grating blade, and place the peeled carrots horizontally in the feed tube. That way, you will get nice long strands of carrot that make your salad look beautiful, and also taste nice and crunchy.

I like the kick of fresh chiles, and love to use Serranos in this recipe, but you can easily use Jalapeños or canned Chipotles. I also love the smokiness of ancho chile powder, but it you don’t have it or don’t like it, you can leave it out or give this salad a North African taste by using Harissa instead.

Garlic is, in my opinion, mandatory, but you can omit it, or add as little or as much as you like. Cilantro can be replaced by parsley, and lime juice by lemon juice. Make this salad your own by using the ingredients you like, have on hand, and most of all, enjoy!

ENSALADA DE ZANAHORIA AL CILANTRO
Spicy Carrot and Cilantro Salad

4 cups coarsely grated carrots, about 450g
1/2 cup coarsely chopped cilantro 
1 Jalapeño or Serrano chile, minced
1-2 cloves garlic, minced
3 Tbsp extra virgin olive oil
2 Tbsp fresh lime juice
1 ½ tsp ancho chile powder
¾ tsp kosher salt, or more to taste

In large bowl, mix carrots, cilantro, Jalapeño chile and garlic. Add ancho chile powder and salt. Mix well. Add olive oil and lime juice and mix well to combine.

You can serve right away, but it is much better if you let it sit for at least 30 minutes to combine flavours.

Makes 4 cups.

Comment

A little something to spice up your meals.

April 10, 2020 Maria Garza
Chilitos Toreados Maria Garza.jpg

Another week of isolation for many of us, and we really start to get in a rut in the kitchen - not unlike any other time - but now it’s worse because we’re in the house 24/7. With the help of social media and chefs at their creative best, I offer you a little something that is so easy to do, but it will perk up your meals in a flash. Enter the little Chilito Toreado. Pan-fried chiles, usually made with Serranos, but if you can’t find them, Jalapeños are readily available in most grocery stores. Quick, easy and best of all, you can make a batch and keep them in the fridge for a few days to spice up your meals and make them special at the same time.

Every time I go to Mexico, I seek out the most popular Taquerías, whether they are street stalls or full blown restaurants, they are a must on my list of places to eat.

In my hometown of Monterrey, I make a point to visit new and trendy restaurants, but there are those places that hold a special place in my heart - because they are so good! One such restaurant is Taqueria La Mexicana, located very close to the Mercado Juarez. 

When you walk in, the aromas engulf you - La Mexicana is first and foremost a butcher shop. They make their own chicharrones, and the smell permeates the establishment. I LOVE pork, so I am in heaven.

La Mexicana is also home to some of the best tacos al vapor in Monterrey, and one must stand in a long line to order and pay, then in another line to receive our order of the most delicious steamed tacos in town.

Along with the tacos, there is a good selection of salsas - green, red and pico de gallo. Mounds of cut-up limes and the best chiles toreados are on the counter and just waiting to enhance our tacos.

The term “torear” means to toast a chile, and many people think that by toasting chiles, they become hotter. You can toast chiles without oil on your comal, but I like to flash fry them in a bit of oil. Some serve them only sprinkled with a bit of sea salt, but I like the umami that a combination of soy, Maggi and Worcerstershire sauces tempered with lime juice brings.

Chiles toreados are a Mexican staple. Every home cook has his or her own recipe for making them for the family, so you don’t have to go to La Mexicana to enjoy them. They are very easy to make and they are amazing with tacos, sandwiches, hamburgers, steak… you name it! But be forewarned: chiles toreados are not for the weak - they are for the brave ones who love spicy heat!! 

Chilitos Toreados
Pan-fried Chiles

½ tsp lard or vegetable oil
10-15 small Serrano (or Jalapeño) chiles, left whole and with stems
Juice of 1 large lime
2 Tbsp soy sauce
1 Tbsp liquid Maggi seasoning
1 Tbsp Worcestershire sauce

In small frying pan, heat ½ tsp lard or oil. Add whole chiles and pan-fry until blistered all over, about 5 minutes. 

In small bowl, mix lime juice, soy sauce, Worcestershire and Maggi seasoning. Add chiles to this mixture while they’re still hot. Let them marinate for a few minutes before serving. 

Comment

In times of crisis, beans are the perfect food.

April 3, 2020 Maria Garza
Frijoles_Charros.jpg


As the world fights the health crisis caused by the Pandemic of Covid-19, most of us have been at home, self isolating for weeks. More than ever, we have been cooking and baking for our families and finding lots of ways to make meals that are substantial, nutritious and from the pantry.

Beans are a great staple food - they’re budget friendly, they are good for you and when you cook them from scratch, you know exactly what goes into them. I have been teaching Mexican cooking for over twenty years and when I talk about cooking beans, I joke about how in Mexico when you get married you will always get a blender and a pressure cooker. A blender to make salsas, and the pressure cooker to make beans!

The beauty of owning either a pressure cooker (or an InstaPot), is that there is no pre-soaking required, making beans a perfectly suitable food for weeknight dinners with only a bit of organization required. If you don’t have one, then a slow cooker works just as well, you just need a bit more planning ahead. Once you taste home cooked beans, you will never go back to buying canned. Best of all, there’s no preservatives and you can control the amount of sodium going into them. A couple of important bits about cooking beans: rule number one - salt them at the end of their cooking time, once the skins have softened. And rule number two, it is better to cook them in more water than less - remember beans expand a lot, so you need lots of water to accommodate for that.
After making the beans, you can make Frijoles a la Charra, one of my favourite ways to make pinto beans.

In Mexico, and more specifically in my hometown of Monterrey, these brothy beans are always part of a Carne Asada. They can be very simple with only vegetables and bacon, but often they include Cueritos, pork hock and even weiners, and can be made Borrachos by adding beer just before serving. These beans taste even better if made the day before, and with the leftovers they make a great dip if you cook them down until thick and then add a melting cheese.

Frijoles a la Charra
Ranch Style Beans

For the Beans:
4 cups pinto beans
12 cups water
1 medium onion, peeled and quartered
4 cloves garlic, peeled
1 tsp dried epazote, or a few sprigs fresh (optional)
Salt to taste

For the Ranch Style Beans:
500g bacon, cut into ½” pieces
1 cup finely chopped cooking onion
¼ cup minced jalapeño chile (with seeds)
2 cloves minced garlic
2 ½ cups diced tomato
8 cups cooked pinto beans
6-8 cups pinto bean broth
1 tsp kosher salt, or to taste
½ cup chopped cilantro 

To cook the beans:
In pressure cooker - place beans, water, onion, garlic and epazote in pressure cooker. Cover and bring up to full pressure. Cook at full pressure for 40-45 minutes. When the time is done, release the pressure and add salt to taste. Remove onions and garlic. Cool and store beans in their broth until ready to use.
*Please adjust quantities to accommodate for the size of your pressure cooker - they should never be filled more than 3/4 full!
In slow cooker - follow the same instructions for pressure cooker, but cook on slow setting for 8 hours. When beans are soft, salt to taste.
**Leftover broth can be used to make “black” rice.

To make the Ranch Style Beans:
In Dutch oven, cook bacon over medium heat, stirring often, until bacon starts to brown on the edges and renders its fat, about 8 minutes. You want the bacon to be cooked but not completely crispy.

Remove bacon and reserve. Drain all but 2 Tbsp of the bacon fat in Dutch oven and add onions and chiles. Over medium heat, sauté vegetables for 2 minutes, or until soft and translucent. Add garlic and cook another minute.

Add tomatoes and cook for about 4 minutes, or until tomatoes break down and start to become saucy.

Add beans and broth and mix well. Add bacon and salt. Bring mixture to a boil and then turn heat down to low. Simmer, uncovered, for 45 minutes, or until beans are a bit thicker. If beans become too thick, you can add a bit more broth.

Adjust seasoning, adding more salt if needed. Add chopped cilantro just before serving.
Ladle into bowls and enjoy.

Serves 10-12

Comment

Cooking (pretty food) while in Isolation.

March 20, 2020 Maria Garza
Bruschetta con tomatoes secos al epazote.jpg

The last couple of weeks have been surreal, as if the world has been turned upside down. Due to the Covid-19 pandemic, life, as we know it, has taken a drastic turn and it’s scary and stressful. We have been asked to work from home if possible, to be safe and to keep everyone around us safe as well. This has impacted everyone and I can say we are living in very uncertain times.

Amongst all the bad stuff, the silver lining, at least for me, is that this situation has forced me to take a step back, to slow down, to appreciate the good things and to concentrate in what’s really important, which is to take care of ourselves and our families and neighbours, and to be kind to one another.

My happy place is the kitchen, and when I feel stressed you will find me there - cooking is my therapy! Thankfully I have a well stocked kitchen and pantry, and this is my opportunity to start emptying the freezer, the place that more often than not sees things go in, but never out! These days I have not been really planning meals, but rather cooking from the pantry and freezer, using up what I have. So with that in mind, I’m sharing the recipe for a very tasty Mexican style bruschetta, made with cherry tomatoes.

A few summers ago, I was fortunate enough to get a gift of organically grown, perfectly ripe cherry tomatoes that were harvested by the Horticulture students at my local college. I was so excited! For a Chef, that is one of the most beautiful gifts you can get! Inspired by the sun-dried tomatoes I saw in Sicily, I decided to oven-dry these beauties, but adding some garlic, olive oil and herbs. I could have gone traditional using rosemary, thyme and parsley, but instead I decided to give these tomatoes a Mexican twist by using epazote.

Epazote is an herb used in many traditional Mexican recipes. It has a very pungent aroma reminiscent of anise, fennel and tarragon, and once it cooks, it blends beautifully with the other ingredients in the preparation. 

This recipe could not be any easier - you just need some patience because it needs to cook very slowly. Slow baking in a low temperature oven cooks the tomatoes in such a way that they start to caramelize and then they pack a huge flavour punch. Toss everything together, and then let the oven do the work. Check every hour and bake for 2-3 hours, depending on how dry you want your tomatoes. Once they’re done, you can use them in many ways - in pastas, blended into salad dressings or dips, or use them to top fabulous bread toasts like this bruschetta.

Make a mixture of crema and cotija cheese, add some fresh herbs like chives or parsley, and season with salt and pepper. Spread this mixture on your toasted bread with top with the oven-dried tomatoes. Garnish with a bit of epazote and you’re ready to enjoy a fabulous taste of summer in the middle of this Ottawa early spring. And it’s OK to enjoy it even if you can’t share it with anyone at the moment.
Stay healthy and stay safe!!


BRUSCHETTA DE TOMATES SECOS AL EPAZOTE
Bruschetta with Epazote Oven Dried Tomatoes

1 lb ripe cherry or grape tomatoes, halved
4 Tbsp extra virgin olive oil
3-4 cloves garlic, sliced thick
2 Tbsp fresh thyme leaves 
3 Tbsp fresh epazote leaves, torn (or 1/2 tsp dried)
½ tsp sea salt
½ tsp coarsely ground pepper

Bruschetta:
1 small baguette, sliced horizontally and cut into 2 1/2” pieces
¾ cup queso cotija, grated (or you can substitute with Feta cheese)
¾ cup crema or sour cream
3 Tbsp finely sliced chives
Salt and pepper to taste
10-12 small fresh epazote leaves or cilantro leaves for garnish

To make tomatoes:

On a baking tray, combine tomatoes, garlic, thyme and epazote leaves, salt and pepper. Drizzle with olive oil. Toss everything together and bake in a preheated 250°F oven. 

After one hour of slow baking, they start to get a bit wrinkled. Don't stir them too much, as they will fall apart - they are very soft at this point. 

Bake for another hour (you can bake them for up to another hour, depending on how dry you want them to be). Let them cool on the tray and then place in a glass jar. If not using immediately, top tomatoes with additional olive oil and store them in the fridge. 

To make bruschetta: 
In small bowl, combine queso cotija with cream and mix well. Add chives and season with salt and pepper to taste.

Place bread on baking tray and toast under the broiler until nicely browned, about 2 minutes. 

Spread some of the cheese cream mixture on each piece of toast. Top with some of the tomatoes, garnish with small epazote leaves and serve right away.

Makes 12 bruschetta.

Comment

The cutest shaped Antojito has to be the Tetela.

March 7, 2020 Maria Garza
Tetelas Maria Garza 2.jpg

Tetelas are bean-filled corn tortillas that are a distinctive triangular shape. They are traditional in the Mixteca region of the State of Oaxaca and they are very easy to make and so delicious! 

Corn, or more specifically corn masa, has been a Mexican staple since pre-hispanic times. There are many different shapes of “antojitos” made with masa, and even more foods to fill them with. 

In the case of our Tetelas, we have a simple but by no means ordinary filling of black beans. This bean paste is uniquely flavored with guajillo chiles and avocado leaves, which gives the mixture that really authentic taste.

If you plan on making Tetelas on a regular basis, invest on a tortilla press, it will make your life easier. If not, you can still make them by pressing the dough between sheets of plastic under a pie plate or something along those lines. It will just require a bit more force, so pretend it is your workout.

Press the dough between two sheets of plastic, and after spreading a layer of beans on the dough, help yourself with the bottom piece of plastic to fold the edges over, forming a triangle. Leaving a little window in the centre of the folds is traditional. Cook on an ungreased griddle just as if you were making tortillas.

Some people open the tetelas on one end and fill them with crema, cheese and salsa, and other people prefer to garnish them on top. I like to add the garnishes on top, as I think they look prettier on the plate. 

Put on some Mexican music, go in the kitchen and make your family and friends a platter of Tetelas. Place two or three salsas on the table, and plenty of beer, and I guarantee you will make them feel like they’re in Mexico!

TETELAS DE FRIJOL NEGRO
Black Tean Tetelas

2 cups Maseca
1 ½ cups water (or more if needed)

2 ½ cups cooked black beans
1 guajillo chile, seeded and de-veined
1 dried avocado leaf, crumbled
1 Tbsp lard or vegetable oil
Salt to taste

1 cup salsa of your choice
1 cup crumbled queso fresco or feta cheese
½ cup crema

In small saucepan, bring 2 cups of water to a boil. Add guajillo chile, cover and turn the heat off. Soak chile until pliable, about 10 minutes. Drain but keep some of the soaking water in case you need it to blend the beans.

In blender container, place cooked beans, soaked chile and crumbled avocado leaf. Add a bit of the chile soaking water if necessary to help you blend mixture until it’s perfectly smooth.

On a medium frying pan, heat 1 Tbsp lard or vegetable oil. Add bean puree and cook for 10 minutes. Season to taste with salt. Bean paste should be pretty thick and compact. Cool and reserve. Bean paste can be made up to two days in advance.

In large bowl, place Maseca. Start adding warm water ½ a cup at a time while mixing until you achieve a smooth dough that doesn’t stick to the sides of the bowl anymore. Dough should be moist enough that when you make a ball and flatten it, it does not crack around the edges. If it cracks, then add a bit more water.

Once you have your masa hydrated enough, make balls the size of a ping pong ball. Keep them covered under a damp towel as you work so they don’t dry out.

Place a ball of masa on a piece of plastic, cover with another plastic and press on tortilla press until it is 1/8” thick. Spread a heaping tablespoon of beans over masa leaving a 1” border around the edges.

With the help of the plastic, fold the masa to form a triangular shape. Start by folding one edge of the masa over itself, and continue two more times to form a triangular shape. 

Meanwhile, heat up a comal or cast iron griddle over medium heat. As the Tetelas are shaped, cook on griddle, turning every minute or so until they are golden and speckled, about 4-5 minutes in total. 

Keep cooked Tetelas in a clean tea towel while you continue to cook the rest.
Serve Tetelas piping hot dressed with salsa, crumbled queso fresco and a drizzle of crema.

* If you have leftover Tetelas, it is best to shallow fry day-old Tetelas in a bit of oil before serving. Just heat a bit of oil in frying pan and cook until golden  and heated through. Proceed with garnishes and serve piping hot.

Makes 12 Tetelas.

1 Comment

The perfect Taco for any day of the week - Chilorio Sinaloense

February 15, 2020 Maria Garza
Chilorio 2.jpg

If you say the word “Chilorio” to any Mexican, they will immediately know it comes from Sinaloa, and specifically from the city of Culiacán. Chilorio is famous nation-wide, and so popular that it is sold in cans and sealed bags all over the country and beyond. 

Culiacán can reach scorching temperatures in the summer, and it is said that Chilorio - traditionally cooked with lard and vinegar - was made as a way to preserve the meat in the days before refrigeration. Usually made with pork, Chilorio can also be made with beef or chicken. The trick is to cook the pork slowly for a very long time, until it falls apart, and then you can easily shred it. 

Chilorio, as its name implies, is made with chiles. Some people like it spicy, and others don’t, so you can decide how to make yours. Usually, there is a mix of dried chiles, ranging from Guajillo (or Mirasol, as it is known western Mexico) to Ancho to Chipotle, if you like a bit of spice.

Once the meat is cooked until tender, you add the sauce made with re-hydrated chiles, garlic, cumin, oregano and vinegar (I like to use a mix of rice and white vinegars, as this mixture comes closer to the flavor of Mexican white vinegar). After seasoning with salt and pepper, the mixture simmers slowly for a while, until everything is well seasoned. 

As I mentioned earlier, Chilorio is made with large amounts of lard. As you can see, I did not use any in this recipe. Instead, I rendered all the fat from the pork, using that instead of adding lard. 

You can serve Chilorio with scrambled eggs for breakfast, or along with potatoes as a main meal. You can also use flour tortillas to make Burritas and serve with your favorite salsa. Either way, after cooking Chilorio, you will be rewarded with one of the most satisfying and delicious meals you have ever had.

CHILORIO SINALOENSE
Pork with Dried Chiles, Sinaloa Style

3 lb boneless pork shoulder, cut into 1” pieces
1 cup water
3 bay leaves
1 Tbsp kosher salt
4 ancho chiles
2 guajillo chiles
2 pasilla chiles
6 garlic cloves
1 Tbsp ground cumin
1 Tbsp Mexican oregano
¼ cup white vinegar
¼ cup rice vinegar
1 ¼ tsp kosher salt
1 tsp ground black pepper

In large Dutch oven, place pork, bay leaves, salt and 1 cup water. Cook over medium high heat and bring to a boil. Turn temperature down to low, cover partially and simmer for 1 hour, or until pork is tender. After one hour, uncover, continue to simmer and let all the liquid evaporate. 

As the liquid evaporates, the pork will start rendering its fat. The fat will accumulate on the bottom, so if there is too much, you need to remove all but 2 Tbsp fat.

Continue to cook pork until it becomes crispy, and the meat becomes so tender than you can smash with the spoon and the meat starts to shred. Cook until you can shred all the meat, another 15-30 minutes.

While pork is cooking, seed and de-vein the chiles. Place in a deep bowl and top with boiling water. Cover and let them soak for 10-15 minutes, or until chiles are very soft and pliable. Fish them out of the water, and reserve a bit of the soaking liquid (about ½ cup).

Place chiles and soaking liquid in blender container, along with garlic, cumin and oregano. Blend until very smooth. 

Add chile sauce to the pork and mix well. Add salt, pepper and vinegars. Mix well and simmer, stirring every few minutes, until sauce becomes a deep red color, about 15-20 minutes. If sauce starts to stick at the bottom of the pan, add a bit of water. Adjust seasoning and serve hot with flour tortillas and salsa.

Serves 6-8.

Comment

An everyday meal, yes, but special nonetheless

July 28, 2019 Maria Garza
IMG_4317.JPG

When people ask me what is the most common lunch in Mexico, I always say Picadillo de Res. What could be easier than using ground beef, tomato salsa, carrots and potatoes? This dish is homey, comforting, filling and delicious. And, it makes the best tacos the next day. Trust me, you want some Picadillo in your weekly rotation.

If you’re anything like me, then it doesn’t matter if you forgot to defrost the beef. The beauty of this dish is you can start with frozen meat and it still works out great. Brown the meat, then make a salsa with tomatoes, onion, garlic and cumin and add it to the cooked meat. Add some diced potatoes and carrots, throw in some frozen peas if you want and let it simmer gently until the vegetables are cooked. All you need for a great meal is some rice, refried beans and tortillas. Excellent everyday fare.


PICADILLO DE RES
Ground Beef Hash

2 Roma tomatoes, chopped 
1 medium onion, chopped
2 garlic cloves, peeled
½-1 tsp ground cumin 
Salt and pepper to taste
1 Tbsp grapeseed oil
450 g lean ground beef or pork, or a combination of both
1 small carrot, peeled and diced
1 medium cooking potato, diced
1 cup frozen peas (optional)

Place tomatoes, onions, garlic, cumin, salt and pepper in blender and process until completely smooth. Reserve.

Heat oil in sauté pan and cook meat until it’s not longer pink. Add tomato sauce. Cook for 5 minutes and add the carrots and potatoes and bring to a simmer. Cover and cook until potatoes and carrots are tender and most of the liquid has evaporated. Add peas and cook another 5 minutes. Adjust seasonings.

Serves 4-6.

Comment

Pozole Verde, the way I remember it.

October 26, 2018 Maria Garza

I learned about Pozole during my trips to Acapulco while I was attending university. My best friend at the time had relatives living there, so each time we could escape, we would go visit them. We had some very fun times in what was then a very popular beach town for international tourists and Mexicans alike.

Nowadays, unfortunately, Acapulco is in what we call a “zona caliente”, or hot zone, dangerous because of drugs and cartel activity. I don’t think I will return to Acapulco anytime soon, but I hold on to very good memories of my time there.

One of the things I love about Acapulco is the fact they had (and still have) an official city-wide Pozole day. Restaurants and home makers have a set day of the week dedicated to making and eating Pozole. Let’s just say it’s a specialty of the town, and it is absolutely delicious.

Pozole can be red, white or green depending on the region it’s made in. The red one is made with pork and chicken (or only pork, in some cases), and seasoned with dried chiles - they add heat and give it its colour. The white one is seasoned with aromatics and herbs, and the green one - my favourite, is chicken based, and seasoned with lots of green stuff like poblanos, tomatillos, cilantro, epazote and pumpkin seeds to give it a bit of a thicker texture. It is delicious!

The other ingredient that characterizes Pozole is the use of “maíz pozolero” or hominy corn. Yes, you can use canned hominy, but if you go the extra mile and cook your own corn from dried, you will never go back, trust me on this one. If you own a pressure cooker, you can cut the cooking time in half, but if you don’t have one, soak your hominy overnight and then cook as directed, it will go a bit faster. If you can’t find maíz pozolero, you can use dried Peruvian mote blanco pelado (peeled white corn), it works like a charm.

As in many Mexican soups, the garnish is just as important as the soup itself. Crown your bowl of Pozole with avocado, radishes and Mexican oregano, and add a generous splash of lime juice and serve with corn tostadas on the side. You will certainly feel like you are in Mexico, at least for a little while.


Pozole Verde estilo Acapulco
Green Pozole, Acapulco style


For the Hominy:
2 cups dry hominy corn
1/4 onion
2 cloves garlic
1/2 tsp salt

For the Pozole Verde:
450g fresh tomatillos, husked and washed, quartered
2 poblano peppers, roasted, peeled and deveined, chopped
2 jalapeño chiles, chopped
1/2 onion, chopped
2 cloves garlic, chopped
2/3 cup toasted pumpkin seeds
1 Tbsp dried epazote (or 8 fresh leaves)
1/2 cup chopped fresh cilantro
1 tsp Mexican oregano 
1 Tbsp vegetable or grapeseed oil
2 litres chicken stock 
3 chicken breast halves, poached and shredded
Salt to taste

For garnish:
1 avocado, peeled and cut into chunks
6 radishes, thinly sliced
Mexican oregano 
Lime wedges
Corn tostadas for serving

For the hominy corn:
In a medium saucepan, place the dry hominy corn. Cover with 2 inches of water and add onion, garlic and salt. Place it on the heat and bring to a boil. Turn down and simmer, covered, for 1 1/2 hours, until corn is tender, adding water if it evaporates too fast. Remove onion and garlic, drain and reserve. (This can be done a day ahead. Keep refrigerated until ready to use.)

For the Pozole Verde:
In blender container, place tomatillos, roasted poblanos, jalapeños, onion, garlic, pumpkin seeds, epazote, cilantro, oregano and a bit of chicken stock. Blend until completely smooth.

In large saucepan, heat oil and cook sauce over medium heat for 10 minutes. Add chicken stock, shredded chicken and cooked hominy corn. Add salt to taste and simmer, partially covered, for at least 30 minutes. Adjust seasoning.

Serve, garnished with avocado chunks, radish slices and crumbled Mexican oregano. Serve with lime wedges and corn tostadas.

Serves 4-6.

Comment

Pozolillo, Pozole's easier but equally tasty cousin.

October 20, 2018 Maria Garza

On one of my visits home to Monterrey, I was chatting with my aunt Miriam. As we always talk about food, she told me of a recipe her sister - my aunt Celina - had recently mentioned. “A recipe that’s so easy and so delicious I just had to make it”, she said. That recipe was Pozolillo. 

What? Pozolillo? Never heard of that! That was the only nudging I needed to research and of course, make. The dish is, indeed, easy to make and delicious, but I could not find much history behind it. It seems it is made in the southwestern States of Guerrero and Jalisco, but there doesn’t seem to be much more info than that - at least, none that I could find.

In Mexico, we all know Pozole, that delicious and famous soup made with chicken, pork and hominy. Pozolillo, as the name implies, is an easier version of its cousin Pozole, which is delicious, but the recipe takes a good 2-3 hours to make. When you’re short on time but you have a craving for Pozole, this is the right recipe for you.

When we work with poblano chiles, usually they need to be roasted, so they can be peeled and deveined. While this is a very easy step, it does add 10-15 minutes to our prep time. The beauty of this recipe is that we can skip the roasting, using the chiles seeded and chopped instead - nice and quick.

I always have home made stock in the freezer, which makes the best soups, but if you don’t have it, commercial stock is fine - as long as it’s low in sodium. If you don’t have a cooked chicken breast, you can use leftovers from a rotisserie chicken from the supermarket. 

All you have to do is throw the poblanos, tomatillos, onion, garlic, chiles and cilantro into the blender, then cook the sauce a bit before adding the stock, corn kernels and the shredded chicken to that, then season and simmer. This soup comes together very quickly. Some shredded lettuce, sliced radishes, diced avocado and lime juice complete the garnishes for a totally delicious, yet very easy soup, perfect for a weeknight meal, or a lazy Saturday night at home.

Pozolillo
Chicken, Poblano and Corn Soup

2 poblano chiles, seeded and cut into chunks
5 medium tomatillos, husked, washed and cut into chunks
1 medium white onion, peeled and cut into chunks
2 garlic cloves, peeled and roughly chopped
2 serrano or jalapeño chiles, stemmed and cut into chunks
½ bunch cilantro (leaves and stems), chopped roughly (about 1 cup)
2 1/2 litres chicken stock
1 double chicken breast, poached and shredded
3 ears of corn, kernels cut off 
2 Tbsp kosher salt or to taste
1 tsp grapeseed or vegetable oil

Garnishes:

2 cups shredded iceberg or romaine lettuce
5-6 radishes, very thinly sliced
3 limes, cut into wedges
1 avocado, cut into chunks (optional)
Corn tostadas (optional)

In blender container, place poblano chiles, tomatillos, onion, garlic, serranos and cilantro. Add a bit of broth to make it easier to blend. Process until completely smooth. 

In large pot or Dutch oven, heat oil and add chile puree. Cook for about 10 minutes, stirring often. Add broth, corn kernels, shredded chicken and salt. Simmer for 30-40 minutes to let flavours develop. Adjust seasoning and serve hot. Garnish bowls with shredded lettuce, sliced radishes and a sprinkle of lime juice. If you want, you can also add chunks of avocado and tostadas on the side.

Serves 4-6
This recipe was first published at www.thelatinkitchen.com

2 Comments

Creamy, mildly spicy and delicious.

September 23, 2018 Maria Garza
fullsizeoutput_1075.jpeg

I love to cook with the seasons, and here in Ottawa, Canada, my favourite time is August and September, when the local markets abound with beautiful fresh corn. A bit less frequently I find poblanos, jalapeños and tomatillos, but when I do, this is the first recipe I make. If I was in Mexico, this would be a frequent item at the table, but in Canada, it’s a special treat.

This recipe is pretty simple to make… the hardest thing to do is to roast the poblanos. I know people who skip this step and use the peppers just as they are, but I think roasting them adds a subtlety of flavour, a smokiness that adds a whole other dimension to the dish. You decide what you want to do, but either way, it is a delicious and decadent dish. Pair it with flour tortillas for an experience out of this world. Taco night elevated to a higher plane, if I may venture to say.

In a pinch, you can make this with frozen corn, but if you have fresh cobs, it is way more delicious. The cheese we would use in Mexico is a fresh queso fresco, not salty at all, and almost a bit squeaky when you chew. That is the perfect cheese. In Canada, it is not very easy to find, so use Italian Tuma cheese (which is also a very fresh cheese), or Feta - both of those work great. Adjust your salt levels accordingly.

One last thing to mention is that this dish can be very mild, or it can be very, very spicy. It will depend on your poblanos. In Canada, they never seem to be spicy, but for you, it will vary depending on where you are and where the peppers come from. Either way, creamy, spicy or not, slightly sweet and smoky make a truly delicious taco. Yum.

RAJAS POBLANAS CON QUESO
Creamy Poblano Strips with Cheese, Corn and Crema

3-4 poblano chiles (about 2 cups roasted strips)
2 Tbsp butter
1/2 Spanish onion, julienned (about 2 cups)
1 clove garlic, minced
2 ears of corn, kernels removed with a knife (about 3 cups)
1 cup queso fresco, Tuma or Feta cheese, cut into 1/2” cubes
1/4 cup crema, crème fraîche or sour cream
Salt and Pepper to taste
A few epazote leaves, optional

Roast whole poblanos over an open flame, either on your stovetop, on the BBQ or under the broiler, turning often, until the skins are pretty blistered and black. Place in a bowl and cover with a plate and let them sweat for about 10 minutes. Remove the stem, seeds, veins and skins, and then cut them into thin strips.

In medium sauté pan over medium high heat, melt butter and add onion and peppers, and cook until onion is soft. Add garlic and corn and cook for another minute, until garlic is fragrant.

Add crema and whipping cream and bring mixture to a boil. Cook until reduced and thick, then cheese. Season with salt and pepper and epazote, if using. Mix gently to combine.

Serve warm with tortillas. This is also delicious as a side for your favourite steak.
Serves 4

For Step by Step images, check out my album on Facebook - The Cultural Kitchen.

Comment

Mmmm....... Barbacoa....

August 6, 2018 Maria Garza
fullsizeoutput_ff0.jpeg

Barbacoa is one of Mexico's most beloved pit-cooked preparations. Do not confuse barbacoa with American barbecue, it has no similarity whatsoever with grill cooking. Instead, it is an ancient tradition that starts with a hole in the ground. Coals line the bottom and when the coals are ready, a huge pot is set over the coals. Into the pot go water, aromatics and beans like chickpeas, and then on a rack over the liquid goes the meat, wrapped in banana leaves or pencas de maguey (agave leaves). A metal cover goes over the top, the pit is sealed with dirt and cloth and the whole thing cooks long and slow, usually overnight. 

Barbacoas are traditionally enjoyed for breakfast, with plenty of tortillas for making tacos, an assortment of spicy salsas and lots of onion, cilantro and lime wedges. The broth becomes a delicious consomé, and perfect accompaniment for the tacos.

I remember growing up in Monterrey, when I lived at the ranch, we would have a barbacoa at least once a year. All the ranch hands and their families would join us and it would be a happy affair. In northern Mexico, it's traditional to have a whole cow's head cooked in the pit, and the meal is outrageously good, the meat so tender it falls apart. Perfect taco fare.

There are different kinds of barbacoas - cow, goat, pork, lamb, turkey and even fish. You may be familiar with Cochinita Pibil from Yucatán - that is pit cooking at its best. In Jalisco, they make Birria, made of lamb or goat. In northern Mexico, as I mentioned, the cow's head is preferred, with the tongue being the most coveted. There are many regional variations, and what I'm sharing with you today comes from Oaxaca where a chile adobo coats and flavours the meat. 

This lamb barbacoa may not have gone into a pit in my back yard, but it is still very, very good. Even better, it is made in the crock pot so you can prep it and walk away to come back 8 hours later to enjoy a fabulous meal. Invite your friends over because Barbacoa calls for a party!

Barbacoa de Borrego estilo Oaxaca
Lamb Barbacoa, Oaxaca style

1.5-2kg bone-in lamb shoulder
2 ancho chiles, seeded and de-veined
4 guajillo chiles, seeded and de-veined
3-4 garlic cloves, peeled and left whole
1 Tbsp piloncillo, chopped (or dark brown sugar)
2 Tbsp apple cider vinegar
1 Tbsp Mexican oregano
1 tsp canela, ground
1 Tbsp kosher salt, or more to taste
2-3 cups water

In medium saucepan, bring 2 cups of water to a boil. Place cleaned anchos and guajillos in boiling water and turn off heat. Cover and let sit for 15-20 minutes, until chiles are soft and re-hydrated. Remove chiles from soaking water and place in blender jar along with garlic, piloncillo, vinegar, oregano, canela and salt. Add a bit of the soaking liquid if your blender needs help. Process to make a smooth paste.

Cut lamb into large chunks (about 3"). Place in large bowl and add chile paste. Toss meat and chile paste to coat all over. Let sit for 30 minutes. Line crock pot with banana leaves. Add marinated lamb and water, just enough to barely cover the meat. Place banana leaf over the meat and cover. Turn slow cooker to the "slow" setting. 

After 5 or 6 hours, taste the meat - it won't be completely ready, but adjust seasonings at this point. Add more salt if needed. Cook for another 2 hours, or until meat shreds easily.
To serve, shred the meat into small chunks. If liquid is too runny, you can place it in a small saucepan and reduce to a thicker consistency. Pour it over the meat and serve with corn tortillas, chopped cilantro, chopped onions and salsa.

Serves 8-10
 

Comment

The best Enchiladas ever!

July 15, 2018 Maria Garza
fullsizeoutput_fdc.jpeg

I really can't believe I have never posted the recipe for Enchiladas Suizas. They are, hands down, my favourite of them all..... and there are lots of different enchiladas out there!

These are special, not only because they're delicious, but because they bring back memories of my childhood in Mexico. My Nana is famous for her Enchiladas, and these are made the way she made them - after all, I learned from her!

When we were kids, we would ask Nana for Enchiladas Suizas at least once a week, if not more. What's not to like? Corn tortillas, chicken, green salsa, cheese, crema. Yum. Just writing this makes my mouth water (and I have just finished eating the plate I photographed!).

My Nana is getting on in years, and she doesn't make Enchiladas anymore, but every time I went home, she would welcome me with a warm plate. And just so you get an idea of how much I like them, years ago we drove from Ottawa to Monterrey, and we were supposed to arrive by suppertime. For one reason or another, we got delayed and we didn't get home until 2am. Nana was not only awake to welcome us, but she had her Enchiladas ready! That is one memory I will never forget, and perhaps that is one of the reasons I like this recipe so much. It just takes me back home.

Aside from all the sentimentalism, these Enchiladas are just delicious. Soft-fried corn tortillas, filled with shredded poached chicken, then rolled up tightly and then sprinkled with melting cheese; 2-3 minutes under the broiler, then bathed in a mild tomatillo salsa and drizzled with crema. It is a feast for the senses. The secret here is to have a salsa that has NO CHILE (yes, you heard me). Enchiladas are supposed to be "bathed" in salsa, so you don't want a scorcher of a salsa here. And the second secret is to have lots of salsa, so every bite you take is really covered in salsa. So now you know the secrets to a great Enchilada. Make these and send me your pictures. Buen Provecho!

ENCHILADAS SUIZAS
Chicken Enchiladas with Tomatillo Sauce
 

SALSA DE FRESADILLA PARA ENCHILADAS
Green Tomatillo Salsa for Enchiladas

12-15 tomatillos
1/2 small onion
1 clove garlic
1/2 cup chopped cilantro
Salt to taste
1 tsp. vegetable oil

Remove husks from the tomatillos, wash well and place in a saucepan with onion and garlic, and cover with water.  Bring to a rapid simmer and cook only until tomatillos are soft, but don't let them burst open. 

Remove tomatillos, onion and garlic from water and place in blender with the cilantro. Process until smooth.  Heat oil in saucepan and add salsa. Cook for 5 minutes. Season to taste with salt and a pinch of sugar if salsa is too acidic. Salsa should not be too thick. If you cook it too long and it gets too thick, thin with a bit of water. Reserve. 

CREMA- Cream
If you don't have access to a Latin grocer, here is an easy way of making your own Crema.

½ cup sour cream
2-4 Tbsp milk, table cream or whipping cream

Add milk to sour cream, whisking until very smooth and you have a pouring consistency

FOR THE ENCHILADAS

16 corn tortillas
450g poached and finely shredded chicken
1/2 cup vegetable oil
1 cup shredded brick or Monterey Jack cheese
2-3 cups Salsa de Fresadilla
½ cup crema

Heat oil in large frying pan. Place tortillas, one at a time, in hot oil, 20 seconds per side.  The purpose of this is to soften the tortillas. Drain on paper towels. 
Place 2-3 Tbsp shredded chicken on each tortilla and roll up tightly. Place seam-side down on sheet pan. Continue until you have used up all your chicken.

Sprinkle enchiladas with cheese and put under the broiler for a couple minutes until cheese is melted. Serve enchiladas on plates, topped with a generous amount of salsa and drizzled with crema.

Serves 4.

P.S. In case you are wondering, the term "Fresadilla" is from Northern Mexico, where we call tomatillos "Tomates de Fresadilla", as opposed to Central Mexico, where they are simply called "Tomates" or "Tomates Verdes" (and yes, they call regular tomatoes "Jitomates"). A bit confusing? Maybe, but that's the beauty of Mexican regional nomenclature!


Comment

Tepache, a lightly fermented pineapple drink.

July 14, 2018 Maria Garza
Tepache 1 Maria Garza.jpg

What is Tepache? In Mexican culture and gastronomy it is a traditional and well loved slightly fermented pineapple drink. Popular since the old days, it was, and still is, very common in most of Mexico, especially in areas that are very hot. 

Historically, Mexican people (myself certainly included), are very thrifty and frugal in the kitchen. No ingredient ever goes to waste. In the case of this Tepache, peeling a pineapple to enjoy the fruit bears double results. That is something amazing and powerful when you have to feed a large family. 

The fun thing about Tepache is that you use the peel and core of the fruit. You place it in a non-reactive recipient and cover with water. You can simply use pineapple and piloncillo, but people like to spice things up by adding canela and even vanilla beans to the mix. 

The concoction sits on the counter, at room temperature, and then the magic begins. Fermentation starts and the longer it sits, the stronger (and more alcoholic) the brew becomes. 

In Mexico, the hot weather aids the speed of fermentation, so the drink can be ready in a couple of days, but in more northern climes, where it's not so hot, it could take a bit longer. 

I like my Tepache only slightly fermented, so it usually sits for only two to three days. And I only make it in the summer months, because the warm weather helps. It reminds me of Kombucha, which I enjoy very much. 

Now... a pitcher of Tepache continues to ferment as it sits in the fridge. Don't be surprised if it is stronger the next day. I like to consume it fairly quickly. Make some Tepache the next time you host a barbecue. Serve cold, with lots of ice and garnished with a pineapple wedge. I guarantee it will disappear fast!

Tepache
Fermented Pineapple Cooler

Peel and cores of 2 very well washed pineapples, cut into 2" chunks
3 litres water
½-1 cup piloncillo, chopped (or dark brown sugar), or more to taste
2 x 2" sticks canela

In large plastic or glass container, place water and piloncillo or brown sugar. Stir to dissolve. Add the pineapple peels and cores, as well as the canela sticks.

Cover with cheesecloth and let sit, on the counter, for 2-5 days. The longer it sits, the stronger it will be. Make sure the cheesecloth is secure over the top of the container, so no fruit flies (if there are any) can get in. Mixture will start foaming as it ferments, and that is OK.

You can start tasting it after two days and if it tastes good to you, then it’s ready. Remove all peels and cores and strain into a large pitcher. Add more piloncillo if you want it sweeter.
Serve over ice, garnished with pineapple chunks.

2 Comments

Pasta in a taco? Yes, and it's delicious!

May 27, 2018 Maria Garza

I just got back from a quick trip home to visit family and while I was there my sister and I ate in quite a few restaurants and cantinas. I noticed that Tacos de Fideo are featured in many menus, and it's not hard to wonder why..... they are delicious!! I tell you, you can put anything in a tortilla and it will taste awesome, and this recipe is proof of that. 
I remember Sopa de Fideo from my childhood - it would either be a brothy soup, or a dry pasta, always flavoured with tomato. I love both versions, but these dry Fideos, seasoned with a tomato salsa with chipotles and Mexican oregano are outstanding. They are even better when you put them in a taco and crown them with cotija cheese, crema and avocado. Trust me, you have to try these. And when you do, you will feel as if you're in Mexico.

Tacos de Fideos Secos
Vermicelli Pasta Tacos

For the Fideos:
1 Tbsp grapeseed oil
2 1/2 cups vermicelli
3 large Roma tomatoes, chopped
1/2 small onion, chopped
1 clove garlic, peeled
1 chipotle chile in adobo, or more to taste
1 cup water
1 tsp Mexican oregano
Salt and Pepper to taste

For the Tacos:
Grapeseed Oil
Corn tortillas
Cotija or Feta cheese, grated
Crema
Sliced Avocados
Cilantro for garnish
Cooked chorizo for garnish (optional)
Lime wedges

In blender container place tomatoes, onion, garlic, chipotle and water. Blend until completely smooth. You should have 3 cups of sauce.
Heat 1 tsp grapeseed oil in medium saucepan and cook salsa over medium heat until it comes to a boil. Season with salt and pepper to taste.
Meanwhile, in large frying pan, heat 1 Tbsp grapeseed oil and cook vermicelli over medium low heat until it's golden brown. 
Add hot salsa and mix to combine. Turn heat down and cook, uncovered and without stirring, for 13 minutes.
Stir pasta gently after 13 minutes and cook for an additional 2 minutes.
Fideos can be served as a side dish garnished with cotija cheese and crema.

For the Tacos de Fideo:
In medium frying pan heat enough grapeseed oil to cover the bottom of the pan. Soft-fry tortillas only to soften them and warm them up. Drain them on paper towels.
Fill tortillas with warm fideos and top with cotija cheese. Drizzle with crema and serve with avocado and lime wedges. Garnish with cilantro.


Comment

When there are wild mushrooms, one must make Menudo.

April 28, 2018 Maria Garza
Menudo de Setas

Menudo de Setas

A few years ago, I went to visit my maternal uncle Eduardo. He has always loved food and cooking, so much so that he became a chef and opened a restaurant in my hometown of Monterrey. He has since retired, but continues to cook at home, and this is a recipe he made for me. I wanted to learn, so I was his sous chef for the afternoon and we had a great time. The food, of course, was delicious!

Menudo is a beloved Mexican dish famous not only for its flavour, but for its power as a hangover remedy. Older teens and adults alike end all-nighters eating menudo at local restaurants in the wee hours of the morning. The thing about Menudo is that it's made with tripe - specifically honeycomb tripe, which is the second stomach of the cow - as well as pig trotters, and I have to admit, it smells pretty strong when you're cooking it at home. This deters many home cooks from making it, hence its popularity at restaurants.

Well, this menudo is neither made with tripe, nor stinky while you cook it. Furthermore, it is vegetarian, but can easily be made vegan if you use water instead of stock. The texture of the wild mushrooms like oyster or maitakes resembles the tripe, and that's how this dish got its name.

The recipe is very easy and the technique is common among Mexican recipes. Roast tomatoes, onions and garlic, toast and re-hydrate dried chiles, blend to make a sauce and then cook the sauce before adding the rest of the ingredients. Sound easy? It is! 

I hope you give this Menudo a try - it is very easy and elegant enough for a fancy dinner. Why not make it for 5 de Mayo? Go ahead and impress your guests!
 

MENUDO DE SETAS
Wild Mushroom Stew with Guajillo Chiles and Epazote

6 guajillo chiles, stemmed and seeded
1 white Spanish onion, peeled and quartered
1 small red onion, peeled and and quartered
8 roma tomatoes, whole
6 garlic cloves, unpeeled
1 Tbsp vegetable oil or lard
1 handful fresh epazote leaves, or 2 tsp dried
2-3 bay leaves
1 tsp dried marjoram or Mexican oregano
2 kg wild mushrooms, or a variety of mushrooms, sliced or torn apart
2 litres chicken stock
1/2 tsp cracked black pepper
Salt to taste

Garnish:
½ onion, minced
1 handful cilantro, chopped
2 limes, cut into slices

Heat a cast iron griddle over medium heat and toast chiles just until they start to get fragrant, 1-2 minutes. Place on a medium bowl and cover with boiling water. Soak for 15-20 minutes, or until completely pliable. Drain and set aside.

On griddle, roast tomatoes, onions and unpeeled garlic until charred all over. Place tomatoes, onions, garlic and 1 cup chicken stock in blender container and blend until very smooth. 

In a large pot or Dutch oven, heat lard or vegetable oil. Pour sauce into pan and mix well with the oil. Add epazote, bay leaves and marjoram or oregano. Cook at low heat, stirring often, to let flavours blend. After 15 minutes, add mushrooms, 2-3 cups stock, pepper and salt to taste. Continue cooking, partially covered, until sauce is well seasoned and mushrooms are soft, another 30 minutes.

For garnish, mix diced onion and chopped cilantro in a small bowl. Set this at the table, along with lime slices. Serve stew in bowls, and let people add the cilantro/onion mixture to their own bowls. Sprinkle lime juice if you like. Serve corn tortillas on the side.

Serves 8.


Comment

This is one of the top two cookies in the world for me, and it's not Mexican.

December 26, 2017 Maria Garza
DSC_0343 (1).jpg

Christmas is the only time of year when I allow myself to unleash the baker in me. I'm a better cook than baker, but I do enjoy a good sweet every now and then. 
Tradition in my family dictates that in the days leading up to Christmas, there must be an insane amount of sweets made - candy more than baking - from homemade marzipan fruits, to a sort of pecan fudge (but not really fudge, since there's no milk in it), to candied nuts to caramels. My family's Christmas dessert table was insane! What every little kid dreams of.
Fast-forward to my life now.  I hate to say that I'm falling way short on the sweet-making. I have a busy daytime job that leaves me little energy for baking or even cooking at night, so I try to catch up on my traditions ON or AFTER Christmas Eve.
This year, since the 24th fell on a Sunday, I did all my baking during the day. I made my favourite cookies - all of which contain a decent amount of butter. Fighting for number one and two on my list are Mexican Polvorones (otherwise known as Mexican Wedding Cookies) and Argentinian Alfajores. I honestly can't decide which ones I like best, I suppose it depends on the day I'm eating them. But if you put them both in front of me at the same time I really struggle to decide!
I will make a blog post about Polvorones at a later date, but today, I want to show you how to make the outrageously delicious Alfajor.
Alfajores are made in many South American countries and in the Caribbean, as well as in Spain, though those differ greatly from the Latin ones. In Latin America, they are a sandwich cookie, with dulce the leche in the middle. Argentina, Uruguay, Peru, Venezuela, Paraguay, Bolivia, Chile, Colombia, Brazil and Puerto Rico are amongst the Alfajor-making countries, though this recipe was given to me by a Salvadorean friend.
Recipes vary - some recipes have cornstarch, others cassava, some have lime or lemon zest, coconut, even chocolate, but all of them have dulce de leche in the middle. This recipe is a classic butter cookie, baked and then filled, then dusted liberally with icing sugar. Yes, they are a little time-consuming to make since you have to roll them out, but keep the dough cold and it will be pretty easy to do. I like to make small ones that you can eat in one bite, but if you want to finish faster, you can make them big!
I hope you make some soon, because I know you'll love them!

ALFAJORES
Argentinian Butter Cookies with Dulce de Leche Filling

2 1/3 cups flour
1/3 cup icing sugar
1 cup butter
1 cup dulce de leche
Icing sugar for decoration

In mixer bowl, cream butter and icing sugar until light and fluffy. Add flour and mix to incorporate. Turn out dough onto a piece of plastic. Wrap and refrigerate dough for 30-60 minutes.

Roll out dough on floured surface to 1/8" thickness, and cut into desired shapes.  Prick all over with a fork and place on parchment-covered baking trays. Bake in 350°F oven for about 15-18 minutes, or until the edges turn golden. Cool on a rack.  When cookies are cool, fill with dulce de leche and then sprinkle tops with icing sugar.

Makes about 40 small cookies.


Comment

It isn't Christmas without Garapiñados!

December 17, 2017 Maria Garza
Almendras 2.jpg

Candy making has a long-standing tradition in Mexico. After the conquest and through to the XVIII century, candy making was in the hands of Catholic nuns in the many convents around the country. The nuns became specialists in the making of the regional sweets so famous in Mexico today. For these nuns, candy making, and the subsequent sale of these candies, provided them with additional income that helped house and feed the hundreds of women within the convent walls. The nuns had the tradition, knowledge and ingredients of the old world, but in the new world,  they had a wealth of new ingredients to play with. This is where the real fusion happened, and what we know as Mexican candies today was created.

One of these traditional candies is Almendras Garapiñadas. A popular street snack in Mexico as well as in Spain, particularly during Christmas, it is traditional to find candied peanuts in the south, whereas in the north you would find pecans.  I like to make mine with almonds.

Garapiñados, as these candied nuts are called, are traditionally made in the copper pots made in Santa Clara del Cobre, Michoacán, but I find that a heavy Dutch oven works just as well. The process is very easy: melt down sugar, add nuts, stir constantly until the melted sugar crystallizes, and then continue stirring until the sugar melts once more to create beautiful shiny nuts. Because you have to stir for so long, I prefer to use almonds instead of the traditional peanuts, as they hold up much better during the cooking process. Peanuts tend to separate into two halves while you cook, and though this does not affect the flavour one bit, I prefer the look of a whole almond instead.

During the holiday season, these Almendras Garapiñadas make beautiful hostess gifts. But make sure you keep some for yourself, as they are deliciously addictive!

Almendras Garapiñadas
Candied Almonds

4 cups raw whole almonds
1 cup sugar
¼ cup water
1 Tbsp ground canela (or cinnamon)
1 tsp vanilla

In large, heavy pot, combine sugar, water, canela and vanilla. Bring to a boil over high heat and then add almonds. Lower heat to medium high and stir constantly with a wooden spoon until the sugar coats the almonds and looks dry, about 10 minutes.  Turn heat to medium low and continue stirring until the sugar begins to melt again and becomes glossy. This could take another 10-15 minutes.

Turn out almonds onto a parchment-lined baking tray or a silicone pastry mat, and toss and stir as they cool, otherwise, they will clump together.

Store in a tin and keep them dry.
Makes about 5 cups.

Comment

Craving something sweet? Make some Sugar Tortillas!

October 15, 2017 Maria Garza
Tortillas Azucar 3.jpg

Some of the earliest memories I have are of food. Specifically, food that came out of my Nana’s kitchen. As incredible as it seems today, Nana used to make tortillas EVERY DAY. We were spoiled beyond belief!

While we were at school, Nana would be in the kitchen, getting ready for what is in Mexico our big meal, around 2pm. As soon as we came home, we would gather around the kitchen table to enjoy our lunch. She would always make our favorite food, and invariably, there would be a simple dessert, like Arroz con Leche, but these tortillas were meant for our Merienda, or afternoon treat!

These sweet little tortillas are a favourite treat of mine - comfort food at its best. They are like a cross between a cookie and a biscuit.  They are super fast to make if you use a tortilla press. Ask your little ones to help you press the dough, they will have a fun time at it. 

Vanilla was not present in Nana’s recipe, but I like the flavour when I use it. You can use extract or ground vanilla bean, which gives the dough a pretty speckled look.

You cook these tortillas on the griddle, just like you do corn or flour tortillas. In just 25 minutes, you can have a platter of these treats, ready to delight your little ones. If you eat them while they’re warm, they will be soft… but if you eat them once they’ve cooled off, they will be crispy. You decide how you like them best. I cannot resist eating one or two as they come off the griddle! Store them in a tin to keep them nice and crispy. Serve them smeared with cajeta for dessert, or plain with a cold glass of milk. Either way, they are delicious!

Tortillas de Azúcar
Sugar Tortillas

2 cups flour
1/2 cup shortening
1/2 cup sugar
1/2 tsp baking powder
1 egg
¼ cup milk
1 tsp vanilla extract

In a large bowl, mix dry ingredients.  Add shortening and mix well, working dough with your hands.  Add egg, milk and vanilla and knead until you have a smooth dough that’s not sticky.

ivide dough into 24 pieces the size of a ping pong ball.  Press with a tortilla press until they are about 3’ wide and ¼’ thick.

Cook over medium heat on an un-greased griddle for about 1 minute and then turn over with a spatula and cook for another minute.  The tortilla should be nicely browned on both sides.

Place on a wire rack and let cool.  These tortillas are soft when warm but harden to a crisp when cool.

Store in a tin for 3-4 days.
Makes 24.

This recipe was first published at www.thelatinkitchen.com

2 Comments

Viva México!!!

September 15, 2017 Maria Garza
Banderita 3.jpg

Independence Day (September 16) is Mexico’s most important non-religious celebration. After all, it took the country 11 years to achieve independence from Spain. We all know that war causes devastation in a country, and an 11-year war is way too long.

More than 200 years later, we still celebrate that most important day. In every Mexican city and town, politicians re-enact the original call for arms that Father Miguel Hidalgo made in the town of Dolores, in central Mexico. Flags, cheers, fireworks and a lot of national pride rule the day (and night). 

Since Mexicans are a patriotic bunch, the celebrations for Independence are at the top of the list. The colours of the flag are everywhere, from food displays in grocery stores to storefront windows, to the food we make at home and in restaurants. 

It is common to order a “Banderita” at the bar. Three shots make up this patriotic drink: lime juice, silver tequila and Sangrita, in that order from left to right, to mimic the colours of the flag. It is the perfect trio to celebrate la Independencia.

Well, we all know what lime juice and silver tequila are. But how about Sangrita? Sangrita is a chaser that is traditionally served alongside tequila. Many versions of it abound, and you can certainly buy commercial Sangrita, but nothing beats this recipe made at home. The best ones are always a mixture of orange, lime and tomato juices, but my version has a bit of fresh celery, Serrano chile, onion and cilantro in the mix. It is addictive and delicious, and can easily be enjoyed alone as a vegetable cocktail or spicy morning juice. I even mix it with beer to make a spicy drink that is both thirst-quenching and delicious. Salud!

BANDERITA
Patriotic Tequila Cocktail

1 shot freshly squeezed lime juice
1 shot white or reposado tequila
1 shot sangrita (recipe follows)

Sangrita

2 cups V8 juice
1 cup freshly squeezed orange juice
4 Tbsp freshly squeezed lime juice
5 tsp minced onion
5 tsp minced Serrano chile
5 tsp minced celery
3 Tbsp packed cilantro leaves
2 tsp kosher salt, or to taste

Banderita:
Serve in 3 shot glasses and line them up in order from left to right: lime juice, tequila and sangrita. The colors mimic the Mexican flag.
Drink a sip of lime juice, then a bit of tequila and chase with sangrita.

Sangrita:
Place all ingredients in blender container. Process until well combined, but not completely liquid, it should have a touch of texture. Serve sangrita cold in shot glasses.

Makes about 3 1/2 cups Sangrita
This recipe was first published at www.thelatinkitchen.com

Comment
← Newer Posts Older Posts →

Copyright © 2025 The Cultural Kitchen
All Rights Reserved

1936 Ranchwood Way Orleans, Ontario K1C 7K7
613.762.0940