• Welcome
  • About
  • Workshops
  • FOOD FOR BLOG
  • Contact
Menu

The Cultural Kitchen

Street Address
City, State, Zip
Phone Number
COOKING CLASSES ON DEMAND

Your Custom Text Here

The Cultural Kitchen

  • Welcome
  • About
  • Workshops
  • FOOD FOR BLOG
  • Contact
Brushes Mercado-1.jpg

FOOD FOR BLOG

The easiest and most delicious Sicilian summer salad.

August 27, 2022 Maria Garza

Back in the day, when I worked at DiVino Wine Studio, I was so fortunate to be able to go spend some time in Sicily, learning to cook from industry professionals and locals alike; it was an unforgettable experience in a beautiful location!

Summer time in Sicily reminded me so much of Mexico, as it is full of cacti bearing prickly pears and tons of bougainvillea. If I closed my eyes, I could almost feel I was back home, maybe that’s one of the reasons I loved it so much there. The people, the history, the culture and the food are amazing, and well worth a trip if you can make it.

Sicily is undeniably Italian and their way to enjoy life and food are inextricably linked. La Dolce Vita is a real thing, and I experienced that while in Sicily. Long, sunny, summer days spent in the kitchen led to long and relaxed evenings around the table - great food, great wine and great company make for an amazing experience. As I reflect on those days now, I realize sometimes we need to take things slow and sit back and enjoy the simple things in life.

That little bit of wisdom can translate to this recipe: simple ingredients can make something truly outstanding, as I learned in Sicily. Just zucchini, lemon juice, mint and olive oil, some seasoning and a simple technique can make the most delicious dish. And serving it to friends and family makes it totally perfect.

This is the best time of year to make this salad, as zucchini and mint are abundant at farmers markets; choose tender, small zucchini because they will have less seeds than the big monster ones. Bring out your flakiest sea salt (I’m using a sea salt from Nova Scotia), your fruitiest extra virgin olive oil (I love Oro del Desierto, from Spain) and grab some mint from the garden and you’ll be ready to go! If you don’t have a mandoline, use a vegetable peeler to make very thin zucchini ribbons.

Make the salad and once plated, let it sit for a few minutes for the salt and lemon juice to do their job of softening the zucchini a little bit, and then enjoy!

Zucchini Carpaccio with Mint

3 zucchini, trimmed
Flaky sea salt and cracked black pepper to taste
Juice of 1 lemon
2-3 Tbsp extra virgin olive oil
Handful of mint leaves

Using a mandoline or vegetable peeler, slice zucchini lengthwise into thin ribbons.

Place ribbons on platter and sprinkle with sea salt and pepper, then drizzle with lemon juice and olive oil.

Top with mint leaves and let sit for 10 minutes.

Serves 4.

Comment

Jumping on the Air Fryer bandwagon, this salsa is so easy to make!

August 20, 2022 Maria Garza

I admit, I am as old-fashioned and traditional as they come, but recently I was asked to develop some recipes for the air fryer. I was dragging my feet, but I have to say, this little machine is great for quite a few things, and one of those is making salsa!

I love roasted salsas, and making them the traditional way on the comal or griddle takes at least 20 minutes of cooking time, depending on the vegetables you’re using. In the air fryer, that time is cut in half and your salsa will be ready much sooner! That is a great thing when we know our lives are busy, busy, busy!

This is my favourite combination of vegetables for salsa, and I have posted other recipes for this before, but take this recipe as a technique and vary your ingredients as you like. If you like a red salsa, use only red tomatoes, if you want it all green, go for only tomatillos; red or white onion, you decide; and chiles could be fresh jalapeños, habaneros, serranos or whatever you have on hand. If you prefer to use dried chiles, they won’t need much time in the air fryer, so I would toast them separately from the veggies, as you don’t want to burn them - no one likes bitter chiles! As always, season boldly, blend, and your salsa is ready!

So if you have an air fryer sitting on your counter, add salsa making to its capabilities. You won’t be disappointed!

Salsa Mixta en Air Fryer
Mixed Salsa in the Air Fryer

Vegetable spray
2 medium Roma tomatoes, whole
4-6 medium tomatillos, husked and left whole
2 Jalapeño chiles, whole
1 piece red or white onion, about 1/3 cup
1 garlic clove, whole and un-peeled
1/2-1 tsp kosher salt, or to taste

Preheat air fryer to 375°F and then spray air fryer basket with vegetable spray.

Place vegetables on basket in single layer and cook for 10-12 minutes, until vegetables are soft and slightly charred.

Remove stems from jalapeños and peel garlic, then place everything in the blender jar.

Add salt and blend, making sure you leave some texture.

Adjust seasoning and serve.

Makes about 1 1/2 cups.

Comment

Tender, savoury meatballs in a Turkish style sauce are outrageously delicious.

July 30, 2022 Maria Garza

I cannot remember hearing anyone say they don’t like meatballs. In fact, I think meatballs are some of the most comforting and beloved foods there are! Every culture has their version and I can’t think of any I dislike. I very much crave Mexican style Albóndigas Enchipotladas, and just because they’re Mexican they would be my number one choice, but these meatballs made in the Turkish style are a pretty close second.

This recipe came about in a peculiar way. I was working on a recipe for stuffed eggplants, also Turkish style, and the sauce for that recipe was so outrageously good that I had to use it for something else, so then these meatballs were born. While the eggplant recipe is not ready (I promise to post it as soon as I’m happy with it), this meatballs and sauce recipe deserves to be shared, so you can enjoy it too!

The ingredients that make this sauce Turkish are the red pepper paste, the Aleppo pepper and the method. It is common in Turkish sauces to have these ingredients and they give the sauce a particular depth of flavour that is hard to replicate without them. If these ingredients are hard to find for you, replace the red pepper paste with the same amount of tomato paste, and for the Aleppo you can use chili flakes. In the meatballs, it is important to use fresh breadcrumbs, so any bread you have on hand will work better than dried breadcrumbs.

I made these meatballs pretty small, about 1”, just because I like them that way, but if you have little time or patience, you can make them as big as you want them. Once shaped, you can freeze them raw and then next time you make some sauce they would be ready, or as I have done many times, freeze them in the sauce, then the next meal is pretty easy and quick. To make my life easier, I like to bake the meatballs first, then finish them in the sauce.

Meatballs in a Turkish Style Sauce

For the Sauce:
4 Tbsp extra virgin olive oil
1 cup diced onion
¾ cup diced green bell pepper
1 long red hot chili pepper, minced
2 garlic cloves, minced
1 1/2 Tbsp tomato paste
2 Tbsp Turkish hot red pepper paste 
1 tsp mild Aleppo pepper
2 ½ cups Marinara sauce or passata
Salt and pepper to taste
1/2 cup water
4 Tbsp chopped parsley
Parsley leaves for garnish

For the Meatballs:
3 cloves garlic
1 cup chopped onion
1 cup stale bread
1 kg ground beef or a mixture of beef and lamb
1 1/2 tsp ground cumin
2 tsp mild Aleppo pepper
1 1/2 tsp kosher salt
1 tsp ground black pepper
1/4 cup chopped parsley

To make the sauce, in large saucepan, heat 3 Tbsp olive oil and cook onion, green and hot pepper until soft, 5-7 minutes.

Add garlic, tomato paste, Turkish hot red pepper paste and Aleppo pepper and cook for 3 minutes.

Add tomato sauce and simmer, partially covered, for 30 minutes.

Season with salt and pepper to taste. Add chopped parsley.

To make the meatballs, use a food processor and turn it on. Drop in the whole garlic cloves and once they are minced, open it and add onion. Chop it finely and then add bread and chop finely.

Add ground beef, cumin, Aleppo pepper, salt and black pepper and using the pulse button, pulse only until mixture is combined, making sure it does not become too smooth.

Remove from food processor and shape into 1” meatballs.

Place meatballs on sheet pan and bake at 375°F for 12-13 minutes, then remove from the oven and add them to the sauce. Finish cooking in the sauce for 10-15 minutes.

Serve, garnished with parsley leaves.

 Makes about 70 meatballs, serves 8-10.

Comment

My version of Kisir, a delicious Turkish Bulgur Salad.

July 23, 2022 Maria Garza

If you follow my adventures, you will know that I fell in love with Turkey the moment Julia and I landed in Istanbul. The culture, the history, the climate, the architecture, the people and of course the food are out of this world!

While I cannot in any way say I’m an expert in Turkish cuisine, I can say I am an enthusiastic student. I have been cooking for a long time to understand flavour profiles and then be able to make my own versions of dishes. This is the case for this delicious bulgur salad.

What I love about this salad is that it is so easy to make and it is as flavourful as they come. I love using new ingredients and one of them here is the red pepper paste (I prefer the spicy one), as well as pomegranate molasses.

This salad could be related to Lebanese Tabouleh, but in the case of Kisir, the cracked wheat is the main ingredient, rather than a supporting actor. As we are using fine cracked bulgur, the only thing we need to do is soak it in hot water for a few minutes and the rest is just adding all the ingredients. Granted, there is a fair bit of chopping to do, but it is well worth it for the results.

There are many ways to make this salad; some people sauté onion and then add them to the bulgur, some people omit the red pepper paste and use tomato paste instead, and instead of pomegranate molasses they use lemon juice. These are all fine substitutes, but I like a lot of flavour and a moderate amount of heat, so I use the spicy red pepper paste as well as tomato paste and I love the sour note of the pomegranate molasses. As for vegetables, I like tomatoes, green onions, cucumber and a good amount of chopped parsley and mint. Balance things off with lemon juice, salt, pepper and olive oil and you have one of the easiest and tastiest salads.

A note on substitutions: if you cannot find the hot red pepper paste, use tomato paste and add some chili flakes for heat; if you cannot find fine bulgur, use regular couscous; and if you cannot find pomegranate molasses, use lemon juice instead.

Kisir makes a great addition to a meze menu, it also makes a great side, served as is or on lettuce leaves. Even better, this salad improves if you make it ahead, so you can make it part of your weekly lunch repertoire.

KISIR
Turkish Bulgur Salad

3/4 cup fine bulgur (cracked wheat)
3/4 cup boiling water
1 Tbsp Turkish hot red pepper paste
3/4 Tbsp tomato paste
3/4 cup finely chopped green onion
1 large Roma tomato, diced
1 cup diced cucumber
1/2 cup chopped parsley
1/4 cup torn mint leaves
Juice of 1/2 lemon, or more to taste
1 Tbsp pomegranate molasses
2 Tbsp extra virgin olive oil
Salt and cracked pepper to taste

In large bowl, place bulgur and add boiling water. Stir it in and let it soften for 10-15 minutes, then fluff with a fork and let cool.

Once bulgur is cool, add hot pepper and tomato pastes, mix in until they are well distributed and then add green onions, tomato, cucumber, parsley mint, lemon juice, pomegranate molasses, olive oil and salt and pepper to taste.

Mix everything very well and serve.

Serves 4-6.

Comment

Salsa Tatemada, a mixed lightly charred salsa.

July 16, 2022 Maria Garza

There are thousands of ways to make salsa, and when I say that, I’m not joking. Every single time I make salsa is a bit different than the one before, even if I’m trying to make the same kind. When you vary the main vegetables, the chiles, the alliums and seasonings, the variations of the final dish are endless. And personally, I think that is tons of fun!

I love the combination of tomatoes and tomatillos, and when I make a salsa with both, I enjoy it the most. Possibly because that is the way my Nana made hers, so there is that nostalgic memory that draws me every time, but that does not make it any less amazing. The tomatillos add a slight tang that complements this salsa very well.

Charring the vegetables over an open flame is a great way to add another dimension of flavour. You can lightly char, as in this recipe, but you can also deeply char, and that salsa will be bolder and more assertive, lending itself very well to grilled meats.

If you have a gas stove, you can char right on the grates, but it makes a big mess. You can use a grill basket, a cooling rack or, as in my case, a flat metal steamer insert that I bought in Chinatown. It has small holes that let the flames through, but the holes are small enough that it does not leave a huge mess on my stove, and that’s why I love it the most - anything that makes my life easier will be my friend. If you don’t have a gas stove, you can char on your barbecue, or under the broiler.

The ingredients in this salsa are all fresh - Roma tomatoes, tomatillos, Jalapeños and onion. You can vary the recipe using the same technique, and use dried chiles, just make sure you toast them lightly so they don’t turn bitter. Make sure you season boldly and don’t blend too much so your salsa has some texture.

Enjoy it on everything, from your morning eggs, your tacos, burritos or tostadas. It is so good even for dipping, so you may want to double the recipe!

SALSA TATEMADA
Lightly Charred Salsa

2 medium Roma tomatoes
3 tomatillos, husked and washed
2 Jalapeño chiles
1 slice white Spanish onion, 3/8” thick
1/2 tsp sea salt or more to taste
1 tsp vegetable oil

Place tomatoes, tomatillos, Jalapeños and onion on rack over flame and char on all sides until vegetables are soft and have blackened somewhat.

Remove Jalapeños and cut stems off.

Place everything in blender jar and add salt. Blend, but make sure salsa still has some texture.

In medium saucepan, heat oil and pour in salsa. Cook over medium low heat until slightly thickened, 5-10 minutes. Adjust seasoning and serve.

Makes about 1 1/2 cups.

Comment

Pretty in Pink, is this Agua Fresca de Tuna

July 2, 2022 Maria Garza

I have to say with absolute certainty that prickly pears, or Tunas, as we call them in Mexico, are my favourite fruit in the whole wide world. Growing up in Monterrey, I looked forward to late summers, when tunas would be in season. My Nanny would go to the market and buy whole cases and as she would peel them, they would be devoured by my siblings and I.

Tunas are the fruit of the nopal cactus, and they come in red, green or golden varieties. All are delicious, but none as good as the golden ones. Unfortunately, they are never exported and even in Mexico, they are getting harder and harder to find. Still, I would never discriminate a tuna and I will eat whatever you put in front of me.

In Canada we only get red ones, and I have to say, I love the colour. Eating out of hand is my favourite, but making drinks with them is my second choice. It is so easy to make aguas frescas and this one is no exception. Just peel, chop, blend, strain, add a bit of lime juice, sugar to taste and a bit more water. That is that. Serve over ice and enjoy. Best summer drink ever!

Agua Fresca de Tuna
Prickly Pear Cooler

4 prickly pears, peeled and chopped
Juice of 1 lime
1/4 cup sugar or sweetener of choice, or to taste
4 cups water
Ice cubes

Place prickly pears in blender jar and add 2 cups water.
Blend over medium speed until fruit is broken up completely, but not so much that you break up the seeds.
Strain into a 4 cup measure and press on the seeds to strain all the juice.
Add lime juice and sugar to taste.
Stir to make sure sugar is dissolved, pour into a pitcher and add 2 more cups of water.
Serve over ice.

Makes 1 litre.

Comment

Monterrey's most iconic breakfast is Machacado con Huevo.

June 26, 2022 Maria Garza

A couple of weeks ago, I made Carne Seca, so today I’m showing you one of the most delicious and decadent breakfasts there is, made with that delicious dried beef.

Growing up in Monterrey, this was one of the most beloved (weekend) breakfast or brunch items, whether at home or in restaurants. If you speak to anyone in Mexico and they find out you’re from Monterrey, one of the first things they will mention is Machacado con Huevo, it is that famous. You can have it plain (eggs and meat), cooked in salsa or a la Mexicana, which is my favourite.

As the story goes, Mrs. Fidencia Quiroga Chavarría opened her restaurant in the town of Ciénega de Flores, about 35km north east of Monterrey in 1928. At the time, the highway from Monterrey to Laredo was being built, and the workers from the project were Doña Fidencia’s clients. La Tía Lencha, as Doña Fidencia was known, started serving a hearty dish of eggs with dried meat, and an icon was born. Carne Seca Tía Lencha was the first commercial brand of dried beef, and it remains one of the most popular.

Another important ingredient in this dish is the tortilla - since this from Nuevo León, the traditional Machacado con Huevo is served with flour tortillas, but if corn is all you have (as is my situation today), this taco does not discriminate. A bit of refried beans on the side and lots of salsa and you will experience one of the best breakfasts there is.

For this dish, we need shredded dried beef, so you can pound homemade carne seca on the mortar, to give it the traditional look. You can also shred it by hand, cut it with scissors or mince it in the food processor.

Machacado con Huevo estilo Monterrey
Dried Beef and Eggs, Monterrey Style

1 Tbsp lard or vegetable oil
1/2 cup minced dried beef
1/2 cup diced onion
2 Tbsp minced Jalapeño or Serrano chile, or more to taste
1 cup diced Roma tomato
4 eggs
Flour tortillas
Salsa
Refried Beans

In medium frying pan, heat oil and cook meat only until toasted, 1-2 minutes.

Add onion and chiles and cook until softened.

Add tomatoes and cook until they break down and become saucy.

Break the eggs into a small bowl and break apart with a fork. Beat a little bit just to mix in the yolks.

Add eggs to pan and turn heat down. Mix gently and cook just until eggs are set.

Serve with flour tortillas, salsa and refried beans.

Serves 2.

Comment

Salsa Asada de Tres Chiles, use this as a basis for a technique.

June 19, 2022 Maria Garza

I first learned how to make a salsa of this kind in Oaxaca, Mexico. I went there to learn from Chefs Iliana de la Vega who at the time had her restaurant El Naranjo (then eventually moved to Austin, Texas) and Susana Trilling from Seasons of My Heart Cooking School.

The food of Oaxaca is amongst the best in Mexico. Tradition, local ingredients, history and lots of love go into the food there. Everywhere you go, there is something delicious to try, whether it’s a giant tlayuda on the streets or the most delicious mole in one the many upscale restaurants. From food to coffee to mezcal, Oaxaca is a food heaven.

One of the best things to do in Oaxaca is to go to the markets (there are many and also in the surrounding towns), that’s where you will find everything you need to cook like a Oaxacan. The variety of dried chiles is astounding! Many of them, like chilhuacle negro and amarillo, costeño and pasilla de Oaxaca are only found there, so stock up if you’re there! Grasshoppers and other insects are also popular, moles, nuts and seeds, and of course, all the meat, fruit and vegetables are the freshest there.

I highly recommend a trip to Oaxaca, it truly is an amazing city and all the surrounding towns have their arts and crafts specialty, so it’s worth day-tripping to find some real beauties. There are also archaeological sites in the area, so there is something for everyone to see.

But going back to our recipe, this is a roasted salsa. What I like about this is you can use it as a base technique. Roasting tomatoes or tomatillos, onion, garlic and dried chiles makes an amazing salsa, but you can use this as a canvas to make your own favourite combination.

My favourite is a salsa made with tomatillos, with at least 3 kinds of dried chiles, like this one. I also make one with 4 chiles and that one is just as good. But if you only have one type of chile, that is also good. Chiles de árbol are fabulous and super spicy, I love using a smoky chipotle or fruity cascabel, and the tiny piquín chies add extra heat. Guajillos also add a beautiful colour and a sweet note. The sky is the limit in combinations here, but to achieve that depth of flavour, the trick is to use dried chiles, not fresh.

Using a molcajete makes this salsa very rustic, but if you don’t have one, a blender works fine, just make sure not to over-blend, as this salsa should have a bit of texture. Salt is very important in all salsas, but especially when using fresh tomatillos, as they’re very tart. I like to add a bit of salt at the beginning and always adjust once the salsa is blended.

Use this salsa in everything, but it is brilliant on barbecued meat, any kind of taco (especially simple bean tacos) or your breakfast eggs.

Salsa Asada de Tres Chiles
Roasted Three Chile Salsa

400g tomatillos, husked and washed
1/4 small Spanish onion, left in a chunk
2 small garlic cloves, unpeeled
1 dried chipotle or chipotle morita chile
3 small cascabel chiles
1 Tbsp dried piquín chiles
Sea salt to taste

Preheat griddle or cast iron pan over medium heat.
Place whole tomatillos, chunk of onion and garlic cloves on griddle and roast, turning as needed, until tomatillos are browned and completely soft, onion is charred and very soft, and garlic cloves are tender.
You will have to move things around the griddle as needed and remove vegetables as they are done so they don’t burn. Don’t be afraid of colour, but we want to avoid complete burnt areas.
When tomatillos, onions and garlic are done, remove from the pan. Chop onion and peel garlic.

Add chiles to pan and very quickly toast. The tiny piquín chiles will only require a few seconds, so be careful they don’t burn. The chipotle and cascabel will take a bit longer, but not more than a full minute.

In the molcajete, place 1 tsp sea salt and the onion and garlic and grind to a paste. Once that paste is smooth, add dried chiles and continue grinding until the chiles have broken down and the paste is smooth.

Start adding tomatillos a few at a time and grind until fairly smooth before adding more. Continue until all tomatillos are done.

Continue grinding salsa until you reach your desired consistency. Adjust salt to taste.

Makes about 1 1/2 cups.

Comment

Carne Seca, a specialty of northern Mexico.

June 5, 2022 Maria Garza

Growing up in Monterrey, one of life’s pleasures was to enjoy a Sunday breakfast of a good Machacado con Huevo, made with Carne Seca. What is that you ask? Well, let’s start with the meat.

Carne Seca is simply salted, dried beef, but there’s nothing simple about this ingredient. Monterrey and the northern states of Mexico were populated by (nomadic) hunting tribes including Chichimecas, Apaches and Tarahumaras. Meat used to be dried in the desert sun as a method of preservation and this is what today is a prized ingredient in my hometown.

Originally, this was done with venison, but eventually it changed to beef. This meat is made by salting very lean, very thin beef steaks and then drying them. Meat was hung up outside, taking advantage of the strong sun, but eventually the process became industrialized. Still, this product remains expensive, as the yield of the meat is about 1/3 of its weight after it’s dried. In years past, I tried to bring some home to Canada, but unfortunately it was confiscated at the airport, so I have never brought it back since then. And ever since then, I’ve said to myself that I needed to learn how to make it. Never mind that was about 15 years ago! Finally, when I bought a dehydrator, this became an easy experiment and I’m going to share that with you today.

Carne Seca is a popular appetizer in Monterrey, think of it as a tapa if you will. Simply lightly toasted on a griddle, it is served with lime wedges and salsa on the side to start a meal. If you speak to anyone from Nuevo León, they will tell you one of their favourite breakfasts is a good Taco de Machacado con Huevo, made in a flour tortilla - dried beef and scrambled eggs - and for good reason! Another way to use this meat is by making a saucy concoction with potatoes, the meat and salsa, and simmered together until thick - this is called Caldillo and you eat it like a stew. Another popular dish made with dried beef is called Atropellado, and it’s simply the beef cooked with salsa, served with tortillas as an appetizer. You can make burritos, sopes, tostadas, tacos, the sky’s the limit with this ingredient! I will share recipes for these things in the coming weeks, but we need to start with the beef.

If you’ve ever made beef jerky, you know the basics of drying meat, but the most important thing is to use very lean meat; fat tends to spoil, so remove any trace of fat before you start. The best cuts for this are sirloin, strip loin or eye of round. The meat has to be cut about 1/8” or just slightly thicker - the thinner it is, the faster it will dry. The meat needs to be salted while raw - for flavour, but more importantly, to inhibit any bacterial growth as the drying process starts. After salting, the meat needs to rest for one hour in the fridge. Depending on how thick the meat is, the drying time will be anywhere from 4-10 hours. After it’s dried, the meat is best stored in the fridge, or freezer for longer storage.

Carne Seca de Res
Dried Beef

500g very lean beef - strip loin, sirloin or eye of round, cut 3 - 4mm thick (1/8” or slightly thicker)
1 Tbsp Diamond Crystal Kosher Salt or 1/2 tsp table salt

Remove all fat from meat, then season on both sides with salt.

Place meat on single layer on a rack set over a tray and refrigerate for one hour.

Arrange meat on single layer on dehydrator racks and set temperature to 160°F.

Dehydrate for 4-10 hours - this will depend completely on how thick the meat is cut, so check starting at 4 hours and go from there.

Meat is done when it is stiffer, dry and brittle.

Let cool completely and store. Meat can then be shredded using scissors or a food processor, depending on how you will be using it.

For an easy appetizer, lightly toast the meat slices on a griddle and serve with lime wedges and salsa.

Makes 175g.

Comment

This fruity mojito style sparkling water is the ultimate fair-weather drink.

May 29, 2022 Maria Garza

It is no secret that I love making drinks. Mexicans grow up drinking aguas frescas made from every kind of fruit (and a few vegetables thrown in!) or iced hibiscus or other teas, so it is no wonder that with the popularity of sparkling waters I had to come up with ways to dress up my bubblies!

Speaking of sparkling waters, I LOVE FIZZY WATER! There, I said it! As I’ve gotten older, my taste for sugar has decreased, so I have not completely abandoned my aguas frescas, but I definitely prefer them either unsweetened or considerably less sweet. So here is where sparkling water comes in - whenever I have a “sweet” drink like hibiscus tea, for example - I will top it off with sparkling water to make it less sweet, and of course, to add those wonderful bubbles. Someone offered me a sweet Sangría? Same treatment - add fizzy water; sweet lemonade? You got it, same thing.

So now that we’ve established my love for fizzy water, let me tell you about the BEST mineral water in the whole wide world! Its name is Agua Mineral Topo Chico, and it is made right in my home town of Monterrey, Mexico, with water from the springs of the Topo Chico mountain. The company has been around for over 125 years. Growing up in Monterrey I never gave it much thought, only took it for granted. Fast forward many, many years living in Canada and I finally have found it in Ottawa Latin stores! When I saw it on the shelf, I did a mental happy dance and immediately bought a few (glass) bottles. At almost $4 each they are not cheap, but for me, they are worth it for special memory-laden moments.

So, the question is how to drink this beautiful Topo Chico? Of course drinking it straight, ice cold is an amazing experience - it is so fizzy and mineral tasting that it is completely thirst quenching and I would probably do that if the weather was super hot (it’s only May, so we’re not there yet). So I decided to make a mock strawberry lime mojito and top it off with it.

This is one of my favourite ways to dress up kombucha, but it works really well for any fizzy water, whether it’s flavoured or not. You can use any berries or different soft fruit like kiwi or mango, use lime or lemon and of course the fresh mint! Muddle the fruit and herbs in the bottom of the glass and then top with the water. I prefer mine unsweetened, but if you like yours sweet, you can add simple syrup or agave. I prefer not to add any ice so I don’t water down my Topo Chico, but I leave that up to you.

I hope you try this method of sprucing up your drinks! Let the summer begin!!

Agua Mineral estilo Mojito de Fresa
Mojito-style Strawberry Mojito Fizzy Water

1/4 lime, cut into chunks
2-3 ripe strawberries, chopped
10 mint leaves
Simple syrup or agave syrup to taste (optional)
1 bottle ice cold Agua Mineral Topo Chico or any other fizzy water

Place lime chunks, strawberries and mint leaves in glass.

Using muddler or back of a wooden spoon, press on fruit until completely mushy.

If you’re using sweetener, this is the moment to stir it in.

Slowly pour in mineral water and stir gently so you don’t destroy the bubbles.

Enjoy immediately.

Serves 1.

Comment

Botanas Locas, the craziest snacks in Mexico.

May 15, 2022 Maria Garza

When you see this recipe you will think it is really out there, but trust me, it will taste like a party in your mouth!

Us Mexicans love to snack, and if the snacks include something acid, spicy and tangy, even better! It is very common to munch on fruit or vegetables doused with lime juice sprinkled with powdered chile – you can give this treatment to cucumbers, jicamas, carrots, pineapple, mangos, coconut, kiwi, oranges, grapefruits and watermelon, If you’ve ever been to Mexico, you probably have seen the local vendors pushing their fruit carts. They mound tons of fruit in glasses, drizzle with lime juice and crown them with powdered chile.

If you take this a bit further, you can drizzle a sauce called Chamoy – homemade versions are made with dried apricots, hibiscus, lime juice, powdered chile, lime and salt. This outrageous sauce is sweet, tangy, spicy and salty and just writing about it makes my mouth water. Well, we love to put chamoy on all those fruits, but also on chips and popcorn. If it’s a snack, it’s great with chamoy.

As kids, we grow up from infancy eating tangy and spicy things like tamarind, so it is not surprising that those flavours tickle our fancy as well as our taste buds! When there are get-togethers, there will always be some sort of snack featuring fruit, veggies, chips, peanuts with powdered chile, lime juice and chamoy. Creative kids and Moms have invented all kinds of “botanas locas” (crazy snacks) that are devoured as soon as they are put out.

A favourite combination is jícama, carrot and cucumber – that is what I would call a classic. Whether you make a large ring or serve them in a bowl or a glass, that is what I like to start with. From there, add whatever you like, from an assortment of different fruit to “cacahuates Japoneses” (coated peanuts), Takis, Fritos, potato chips, gummy bears, or any of the Mexican candies you find in your local Latin store. Drizzle with lime juice, powdered chile (ground chile de árbol if you like to live dangerously, or Tajín for a milder heat) and lots of Chamoy. Grab a spoon and dig in!

Botanas Locas
Crazy Snacks

1/2 small jicama, peeled and shredded
2 medium carrots, peeled and shredded
1 English cucumber, peeled, seeded and shredded
1 mango, peeled and diced (optional)
Cacahuates Japoneses and/or Hot Nuts Peanuts
Potato chips, Fritos, Doritos or Takis, crumbled
Juice of 2 limes
Powdered chile de árbol or Tajín
Chamoy
Skwinkles, gummies or any other Mexican candy

After you shred the cucumber, place it in a sieve and make sure all the liquid drains off.

In small glasses, layer equal parts of jicama, carrot and cucumber, then top with fruit (if using). Top with peanuts, crumbled chips and whatever candy you have.

Drizzle with lime juice, add some powdered chile and lots of chamoy.

Serve immediately with a spoon.

Makes 4.

Comment

Refried Beans, a must in any Mexican kitchen.

May 1, 2022 Maria Garza

One of the most common ingredients in the Mexican kitchen has to be beans. We eat beans every day, and often, more than once a day. Beans make an appearance at the breakfast, lunch or dinner table, whether as a side dish or the main event. Beans are delicious, good for you and easy on the budget. No wonder they are a staple in the Mexican diet!

I often joke and say when a Mexican girl gets married, one of the wedding gifts will always be a pressure cooker (along with a blender), so this modern girl can cook beans at the drop of a hat. No soaking required, a pressure cooker cooks beans in 40 minutes and then you can carry on with your day. Aren’t we all about convenience nowadays?

There are many varieties of beans eaten in Mexico, but the most common are pintos, bayos, Peruanos or black turtle. There are also delicious varieties only available regionally that are well worth seeking out. If you live outside Mexico like I do, you may find pintos and black beans most easily, but you can make this recipe with whatever beans you have available. The technique will be the same.

If you’re in a pinch, you can make these refried beans from canned beans, but I encourage you to make them from scratch, as you can control the amount of sodium going into the recipe, as well as stay away from preservatives (and you can make so much more for a fraction of the cost).

To cook beans, the most important thing is to have enough water, so think for one part beans, there should always be at least 3-4 parts water. I add a few cloves garlic and a chunk of onion and a tablespoon of dried epazote to the pot (if you’re lucky to have fresh epazote, throw in a few sprigs) along with just a bit of salt (I always add more salt after, so just a bit in the pot is good to start seasoning them). Close the lid of the pressure cooker, bring it up to high pressure and set the timer to 40 minutes. If you’re cooking them in the slow cooker, then cover them and cook on slow for about 8 hours, until beans are tender.

Once you have cooked beans, store them in the fridge in their broth and use for this refried beans recipe of whatever else you desire. You can also freeze them for later use. This recipe is made in the blender for very smooth beans, but if you prefer chunky beans, simply mash using a potato masher after you add them to the pan.

FRIJOLES REFRITOS
Refried Beans

4 cups cooked beans in broth
4 Tbsp manteca or vegetable oil
1 cup chopped white Spanish onion
1 Jalapeño chile, minced
2-3 Tbsp dried ground ancho or guajillo chile, or 1 dried ancho or guajillo chile, seeded, deveined, rehydrated and finely chopped (optional)
Salt to taste
Crumbled cotija or feta cheese for garnish (optional)

In blender jar, place beans and broth. You should have about 2 cups broth, and if not, add some water to make up for the difference. Blend until smooth.

In large saucepan, heat oil or lard. Cook onion and Jalapeño until soft and translucent.

Add the beans and reduce the heat to medium low. Simmer, stirring often, until beans reduce and thicken. The beans should be compact, but not dry.  If they dry out too much, add some water or broth.

Serve the beans garnished with crumbled cheese on top.

Makes about 3 cups. 

Comment

Guacamole is the king of dips and spreads.

April 24, 2022 Maria Garza

As I sat thinking of a new recipe for the blog I realized I have never shared a recipe for traditional guacamole. I almost cannot believe it! I suppose that since guacamole is one of the most requested recipes in my classes, that’s why I never thought to share it here, but that oversight will be corrected right here, right now!

The fruit that has taken the world by storm and appears in many restaurant menus in one way or another is something that us Mexicans have always taken for granted. Avocados are native to Mexico and there are many varieties, including some tiny ones that have edible skins!

Mexico is the largest producer and exporter of avocados in the world and most of the production is concentrated in the Michoacán area. Unfortunately, this area is also riddled with cartel activity that has sadly impacted the industry negatively. Regardless of all this, avocado remains a beloved ingredient in Mexican recipes, and the most famous and common dish made with avocados is Guacamole. The word itself has Aztec roots - it comes from the náhuatl words aguacatl (avocado) and molli (sauce), so in essence, the word means avocado sauce. Simple enough, right?

The traditional guacamole is an easy pairing of our most beloved ingredients: avocados, tomatoes, onions, chiles, limes and cilantro. In essence, guacamole is mashed avocado with pico de gallo mixed in. You can add other ingredients as you fancy, from pomegranate arils to pumpkin seeds. If you like garlic, go ahead and add some. You can omit the tomato or use tomatillo, you can use roasted salsa instead of the fresh veggies. There are chunky versions and there are smooth versions and some include a bit of olive oil. The mashed avocado is really a blank canvas for you to create your masterpiece.

My favourite way of making this creamy concoction is in my Mom’s molcajete, or stone mortar and pestle. I mash about 2/3 of the avocado and leave the last third in bigger chunks, then mix in the tomatoes, onion (white or red Spanish please!), Jalapeño and cilantro. Finally, a healthy dose of fresh lime juice, sea salt to taste and that is that! Guacamoles are a must in every carne asada or barbecue in Mexico, served with lots of totopos (corn chips), but also are a common spread in meat tacos or tostadas, whether steak, pork or chicken.

Lastly, a word on buying avocados. I prefer to buy them green and hard as rock. Leave them on the counter at room temperature for 2-3 days and when they turn black and yield to soft touch, then they are ready to use or store in the fridge. It takes a bit of planning ahead, but it is better than buying ripe avocados from the store, since they are fragile and oftentimes are bruised already.

I hope you make a batch of guacamole really soon. And no one will judge you if you decide to sit on the couch with a bowl of chips while you watch your favourite show!

GUACAMOLE TRADICIONAL
Traditional Guacamole

2 large ripe avocados
1 medium Roma tomato, diced
1/2 cup diced white Spanish onion
1 Jalapeño chile, minced
1/2 - 3/4 cup chopped cilantro
Lime juice to taste (I like at least 2 Tbsp)
Salt to taste
Corn chips for dipping

Core and pit avocados and place in mortar bowl. Mash, leaving some chunks for texture. If you don’t have a mortar and pestle, mash in medium bowl using a fork or potato masher.

Add diced tomato, onion, jalapeño and cilantro and mix well.

Add lime juice and salt to taste.

Serve immediately with corn chips.

Makes about 3 cups.

Comment

A refreshing ruby hued drink, Agua de Jamaica is pretty and delicious.

April 11, 2022 Maria Garza

I am sure you have heard me talk about Mexico’s Aguas Frescas. They come in a rainbow of colours and a variety of flavours, made from fruit, some vegetables or dried flowers, as is the case of Agua de Jamaica (hibiscus tea).

Jamaica, or Flor de Jamaica, as it is known in Mexico, is the dried flower of the roselle plant. It is common in many parts of Latin America and the Caribbean, though it is made slightly different in other places outside of Mexico. Agua de Jamaica is made by steeping the dried flowers in boiling water, then straining and adding more water and sugar to taste, it’s as simple as that. Though you can certainly drink this tea hot, in Mexico it is served with lots of ice for a very refreshing drink.

Agua de Jamaica is very tart, so usually it is sweetened with white or brown sugar. You could also use agave syrup, honey, monk fruit sweetener or piloncillo, whatever you prefer. After the flowers are steeped and you strain the mixture, you can use the hydrated flowers to make some unique hibiscus tacos (find that recipe here in the blog). Another clever use of this tea is concentrating it so you can make a vinaigrette - as it is so tart, it takes the place of vinegar and it makes a beautiful and delicious vinaigrette (the recipe for that is here in the blog as well). In Mexico this drink is made with only hibiscus blossoms, but I learned to add ginger from a Jamaican friend. I love the combination of hibiscus and ginger, so this is the recipe I’m sharing with you today. If you are not a fan, leave the ginger out.

Aside from being delicious, hibiscus tea is good for you! It is caffeine free, rich in antioxidants and a good source of vitamins and minerals, so go ahead and make a pitcher and enjoy!

AGUA DE JAMAICA
Hibiscus Iced Tea

2 litres water, divided
1 cup jamaica blossoms 
8 thin slices ginger (about 2-3 Tbsp)
Sugar to taste


In medium saucepan, place 1 litre water, Jamaica blossoms and sliced ginger. Bring to a boil.

Once mixture boils, cover the pan, turn the heat off and set a timer for 30 minutes.

Strain into a pitcher and add 1 litre water and sugar to taste. Chill and serve over ice.

Makes 2 litres.

Comment

Gazpacho Moreliano is THE best fruit cocktail.

April 3, 2022 Maria Garza

One of the most beautiful places to visit in central Mexico is Morelia, in the State of Michoacán. Part of UNESCO Heritage, the old colonial city was founded in 1547 with the name of Valladolid by the Viceroy of New Spain, by grant of King Phillip II. The city prospered and hundreds of new buildings were constructed. The seat of the Bishop of Michoacán was transferred from Pátzcuaro to Valladolid in 1540 and the city is home to many convents. It is said that you cannot walk one block without encountering church.

With beautiful architecture featuring the pink stone from the area quarries, the city is built in the baroque style, and it boasts over 1700 heritage buildings. In the early 1800’s the city was the hot spot for insurrection, and the movement for Independence started in Valladolid. The leaders of the movement were two priests, one of which was born and educated in the city. Valladolid was renamed Morelia in 1828 in honour of one if its sons, Jose Maria Morelos y Pavon, a hero of our Independence.

The city is beautiful, historic and culturally important. But the food in Morelia is equally impressive. As you know, Mexican Gastronomy attained the nomination for UNESCO’s Intangible Cultural Heritage of Humanity in 2010, but what you may not know is that it happened thanks to the food or Michoacán, and specifically the Purepecha people native to the State. A visit to Michoacán is worth its weight in food! The State boasts an impressive number of traditional cooks - all women - scattered around the towns near Morelia. Many of them cook out of their homes and it is possible to visit and sample their food. They have a gathering every Spring in Morelia - Encuentro de Cocineras Tradicionales (food fair) - that is well worth the trip.

Honouring family traditions and roots, the food of Michoacán stays true to its historic past. Women still grind corn on metates to make masa, and the tortillas there are some of the best I’ve ever had. Uchepos and Corundas, both types of tamales, are only made there and they are simple but complex, carrying hundreds of years of history within them. The stews, called Atakapuas, thickened with masa are unique and originally plant-based before the arrival of the Spanish. The list goes on and on. The food in Morelia is outstanding, that’s all I can say.

Walking the streets of the old city is a pleasure and one can find all kinds of treats. I was there in April and the days were hot. One of of the best things you can buy is a Gazpacho Moreliano. Not the same as the Spanish cold soup, this gazpacho is a refreshing fruit cocktail. The traditional version is made with jicama, mango and pineapple, mixed and layered with dry, salty cotija cheese and chile piquin on tall glasses. Topped up with fresh orange juice and served with a spoon. Wandering around the plaza with a gazpacho in hand is a common sight in Morelia and you will encounter Gazpacherías almost on every block.

I am giving you some guidelines to make this, as you don’t really need a recipe. Make it to your taste. Layer the fruit, cheese and chile in the glasses, then add enough orange juice to come up about 2/3 of the way. If desired or needed, you can add lime juice and salt to taste. You can add watermelon or cantaloupe to the fruit, or cucumber to your mix if you want to add a vegetable component. Some people like to add chamoy - that tangy, spicy apricot hibiscus sauce. Make your gazpacho in tiny glasses as an appetizer, or large like in Morelia, but try it and see what all the fuss is about!

GAZPACHO MORELIANO
Morelian Fruit Cocktail

2 parts diced mango (I like Ataulfos)
2 parts diced pineapple
3 parts diced jicama
Fresh orange juice
Fresh lime juice (optional)
Grated cotija cheese, or dry feta
Dry chile piquin or Tajin
Chamoy sauce (optional)

In bowl, combine mango, pineapple and jicama.
Fill glasses halfway and sprinkle with cheese and chile.
Continue to fill the glasses with fruit and top with more cheese and chile.
Pour orange juice into glasses to fill 2/3 of the way.
Squeeze lime juice if desired and sprinkle with a bit of salt and drizzle with chamoy if using.
Serve with a spoon and enjoy!

Comment

This Salsa Macha is hot, in more ways than one.

March 27, 2022 Maria Garza

Salsa Macha is hot, and I mean that literally and figuratively. Not surprisingly it was named the most valuable condiment of 2020 by the New York Times. And that is outside of Mexico. In Mexico, Salsa Macha has been popular for ages, and for good reason.

The name of this salsa refers to the fact that it is extremely spicy, so if you are brave enough to eat this super hot condiment, you are considered a Macho. Its origin is argued between Veracruz and Oaxaca, but the Olmecs were already mixing toasted dried chiles with palm oil to make a condiment that would last a long time. Veracruz and Oaxaca share a border, so we could say it could belong to both. Today, the difference in the salsas made in Veracruz to the ones made in Oaxaca is the type of chiles and other ingredients used: in Veracruz they typically use dried morita and cuaresmeño chiles, along with peanuts, whereas in Oaxaca they use chile cascabel and grasshoppers. It is very obvious to me that the Salsas Machas of today are a fusion of ingredients that came after colonization, and Veracruz was a major port where foreign ships arrived, so it is not surprising to see sesame seeds in most recipes.

The three ingredients that MUST be in a Salsa Macha are dried chiles, oil and nuts or seeds, so the beauty lies in the creation of the flavour profile for it. I like mine to be really spicy, so the bulk of my recipe is chile de árbol, but then I like to add other types of chiles to give it different notes - earthiness from the anchos, brightness from the guajillos and even more intensity from the piquines. For crunch, I love peanuts and sesame seeds equally, so one day I will use peanuts (like today) and other days I will use pumpkin seeds, but you could certainly mix them up. Sesame seeds are essential, as well as a bit of vinegar to add acidity. Another must is the garlic (are you thinking chili crisp here? there certainly is a similarity!), which gives this salsa that real crave-worthy appeal. Lastly, the Mexican oregano - though optional - it does add a herbaceous tone to the salsa, yet another dimension.

The technique is very easy, and the only real thing to keep an eye on is how fast you cook that garlic. I like to put the oil, peanuts, sesame seeds and garlic in the saucepan, then turn on the heat to medium high for a couple of minutes. When I start to see little bubbles appear on the edges of the pan, I turn the heat down to medium - medium low and keep an eye on that garlic. It will slowly start getting golden, and when you see it get golden on the edges and whitish on the centres, then turn off the heat, add the chiles and let it cool for 10 minutes. The other important thing is to dissolve the salt in the vinegar before adding it to the oil, as salt doesn't dissolve easily in oil. After the mixture is cooled completely, then it goes to the blender, but make sure you leave some chunky texture in your salsa - it should never be completely smooth.

Salsa Macha lasts forever! Well, not forever because you will want to put it in everything. It is really delicious on seafood, on all manner of tacos and antojitos, pizza or grilled meats… you can add some of the oil to your favourite noodles or pasta sauce (arrabbiata anyone?)… need I go on?

I hope you make a batch of Salsa Macha and make it part of your repertoire. It will really be a game changer!

SALSA MACHA
Spicy Chili Oil Salsa

2 cups grapeseed, vegetable or olive oil
1/3 cup (40g) raw peanuts
1 Tbsp (10g) raw sesame seeds
4 large cloves garlic, peeled and sliced thick
3/4 cup chile de árbol (20g), cut into 1” pieces
2 chile guajillo (15g), stemmed and seeded, cut into 1” pieces
2 chile ancho (20g), stemmed and seeded, cut into 1” pieces
2 Tbsp (5g) chile piquín
1 Tbsp (15g) apple cider or pineapple vinegar
1 tsp sea salt
1/2 tsp Mexican oregano (optional)

In medium saucepan, place oil, peanuts, sesame seeds and garlic. Turn on the heat to medium high and when you see small bubbles on the edges of the oil, turn heat down to medium - medium low.
Continue to cook until garlic is golden around the edges but still white in the centre.

Add the chiles and turn off the heat. Mix well so all chiles are coated. They will cook in the residual heat.

Let mixture cool 10 minutes. Meanwhile, dissolve salt in the vinegar completely. After the 10 minutes, add vinegar salt mixture and Mexican oregano to the pot and let cool completely.

Once mixture is cool, transfer to a blender. Blend slowly, making sure you leave some texture in your salsa, it should have chunks of nuts and chiles. Transfer to a glass jar.

Makes about 2 1/2 cups.

Comment

Tuna Tostadas, another great Lent meal.

March 20, 2022 Maria Garza

If you scroll through Mexican food social media accounts at this time of year, you will notice there is a lot of fish and seafood recipes, and that is because we are going through Lent. As I mentioned in my previous post, Mexicans are a very religious lot, and with the majority of the population being Catholic, it is not surprising people follow tradition.

As I’ve said before, I love traditions, and especially the ones that involve good food! If I am honest, I do not eat as much fish as I should, and though canned tuna may not be considered proper fish, I like it and I eat it in moderation.

Recipes called “a la Mexicana”, are making a reference to the colours of our flag - red, white and green, so the ingredients to use are red tomatoes, white onions and fresh green chiles. Making things in this method is a simple, yet delicious way of cooking, and this formula applies to many different ingredients, from chicken, eggs, beef, pork (or most proteins, for that matter) to vegetables like zucchini, cabbage or corn to name a few.

This is a very simple recipe, so the quality of the ingredients matters - I prefer tuna packed in olive oil - after it is well drained, it will not add moisture to the final dish, and in this recipe we are aiming for a dry-ish mixture so the tostada remains crispy. There is nothing worse than a soggy tostada, believe me!

As for the the rest of the ingredients, in Mexico we prefer using white (Spanish) onions, but you can mix red and white or even use cooking onions in this dish. In this particular recipe I prefer using Roma tomatoes, as they have less seeds than vine tomatoes (remember, we want a drier dish and a lot of seeds would add a lot of moisture), and you can use Jalapeños or Serranos (or even canned chipotles if you don’t have fresh chiles, but technically your dish would not be considered as being “a la Mexicana”). I use tomato paste from a tube - unless you’re using the whole can, the tube is way easier to portion and store, so it is definitely worth seeking out at your grocery store. Finally, lime juice and fresh cilantro will give your tuna acidity and brightness.

When you’re buying tostadas, look for sturdy ones that will hold the tuna without crumbling easily, there are a lot of brands out there so keep an eye out for thicker ones. Also, the size will determine how many people you will feed with this recipe - there are brands out there that are quite large.

And finally, the garnishes: sliced avocado, crema and cilantro leaves. Another way to use the avocado here is to make a simple guacamole and spread on the tostada first, then top with the tuna, but I leave that up to you. A drizzle of crema and a few cilantro leaves is all you need, as the spice is already built into the filling. But if you want extra heat, go ahead and add salsa on top. Serve with some lime wedges and enjoy!

Tostadas de Atún a la Mexicana
Mexican Style Tuna Tostadas

2 Tbsp vegetable oil
1 cup diced onion 
1 Jalapeño chile, minced (seeded if you want less heat)
2 cups diced Roma tomatoes 
2 Tbsp tomato paste
1 1/8 cups drained canned chunk tuna
Juice of 1/2 lime
Salt and pepper to taste
1/2 cup chopped cilantro
Corn Tostadas
2 avocados, sliced
1/2 cup crema, crème fraîche or sour cream 
Cilantro leaves for garnish

In medium frying pan heat oil over medium high heat.
Add onion and Jalapeños and cook until softened.
Add tomatoes and cook until they break down, about 5 minutes.
Stir in tomato paste and cook another two minutes.
Add tuna and lime and salt and pepper to taste.
Simmer for 5 minutes and add cilantro.
Serve on corn tostadas, topped with avocado slices.
Drizzle with crema and cilantro leaves.

Makes about 2 1/2 cups, serving 2-3.

Comment

Just in time for Lent, the classic Mexican Shrimp Cocktail.

March 6, 2022 Maria Garza

Mexico is a deeply devout Catholic country, and people take religion very seriously. Holy Week is one of the most important religious celebrations, and it all starts with Lent, 40 days before Easter. Lent begins on Ash Wednesday and ends on Palm Sunday, and during this period of fasting - nowadays specifically on Fridays - people avoid eating meat. This is the time when people also give up eating certain favourite foods, as a way of penitence or internal purification.

Now, I am not a strict practicing Catholic, but I have always enjoyed traditions, and this tradition is one I can certainly get behind. Introducing fish and seafood into our diets is good and having a reason to do it at least once a week makes it easier for meal planning. It is also a great way to expand our culinary repertoire to include other kinds of dishes we may not normally make.

Even though it’s March, the weather is still pretty awful here in Ottawa, so making this bright and sunny Coctel de Camarones makes me feel happy. This cocktail is made in the style of Acapulco, though I have added a couple ingredients that make it a little more Baja or Tabasco. Though this recipe is made with shrimp, you can certainly add octopus, oysters or scallops.

Our main ingredient and the star of this show is of course, the shrimp. I love to use wild Argentinian pink shrimp because they are meaty, sweet and they almost taste a little bit like lobster, so it is worth it to seek them out. When I talk about this recipe, people cannot believe there is ketchup in a classic Mexican shrimp cocktail, but it is an essential ingredient. It provides that “sauciness” that we want, but make sure you don’t go too far to make it too sweet, as sweetness is not something we desire here. We also add bottled hot salsa to counteract that sweetness and add more spice. Adding Clamato makes it way more interesting, and I like a dash of Worcestershire sauce to give it umami. The rest of the ingredients are like a pico de gallo: diced tomato, jalapeño or serrano chile and onion (red or white, though I prefer red). A bit of cucumber adds extra crunch and absolutely essential is the creamy and luscious avocado. Season with salt, black pepper and lots of lime juice, and finish with chopped cilantro. Serve with a spoon and totopos, tostadas or saltine crackers.

Whether you’re following the rules of Lent and need a Friday recipe, or just to brighten up your day, try this recipe out! It will transport you to a sunny Mexican beach. Add a beer and a bit of music and you will feel happy!

Coctel de Camarones a la Mexicana Clásico
Classic Mexican Shrimp Cocktail

340g raw Wild Argentinian Pink Shrimp, thawed, peeled and deveined
1 Tbsp salt
1 large Roma tomato, diced 1/4”
1/4 cup minced red onion
1 Jalapeño or Serrano chile, minced (seeded if you want less heat)
1 cup diced Lebanese or English cucumber
1/3 cup ketchup
1/4 cup Clamato juice
1 Tbsp Extra Virgin Olive Oil
Juice of 1 lime or more to taste
2 Tbsp bottled hot salsa, such as Botanera, Cholula or Valentina, or more to taste
A few dashes Worcestershire sauce
Salt and pepper to taste
1 large ripe avocado, peeled and diced
3-4 Tbsp chopped cilantro
Corn Tortilla Chips, Tostadas or Saltine Crackers

In medium saucepan, heat 2 litres water. Bring to a boil and add 1 Tbsp salt.
Add thawed shrimp and cook for 1 1/2-2 minutes. Drain and cool under cold running water, then chill completely.

In medium bowl, combine tomato, onion, chiles, cucumber, ketchup, Clamato, olive oil and lime juice.
Stir in bottled salsa and a few dashes of Worcestershire to taste. Season with salt and pepper to taste.

Add avocado, cilantro and chilled shrimp and toss very gently.

Serve with tortilla chips, tostadas or saltine crackers.

Serves 3-4 as a starter.

Comment

When it comes to flavour, Papas con Chorizo pack a punch!

February 27, 2022 Maria Garza

If you’ve never tried Papas con Chorizo, you’re in for a treat. Everyone likes potatoes, but when you sauté some onions, jalapeños and throw chorizo into the mix, you have a truly special dish.

Papas con Chorizo is a popular filling for gorditas, empanadas and tacos, and it is also used as topping for sopes, huaraches and garnachas. If there is street food, chances are one of the fillings or toppings will be this iconic dish, and for good reason!

You can have chunky papas con chorizo, or they could be completely mashed or just a little bit lumpy, depending on what you will be using them for, but they are so delicious because the fairly bland potatoes absorb the flavours of the onions, chiles and especially the chorizo. And if you cook with manteca, or rendered lard, well, you are in for a treat! All those street foods taste so good partly because the cooks don’t spare on the fat they use too cook with, and in many instances it will be the traditional and flavourful manteca. So, if you want to take this dish over the top, use manteca and don’t be stingy with it!

On the subject of chorizo, remember Mexican chorizo is in a class of its own - it is a raw pork “sausage” condimented with dried chiles, garlic, vinegar and spices. Don’t confuse it with Spanish chorizo because that would behave in a very different way (though cured chorizo used in this recipe would also taste really good!). You can find Mexican chorizo in any Latin store near you, or you can make your own, as I do in Ottawa, because for many years it was not available here so I started making it at home - and once you do, you never look back.

The potatoes used for this dish are white or yellow potatoes, but try not to use the starchy baking kind, because those will fall apart pretty easily. It is better to use a firmer potato that can keep its shape after cooking in water for 10 minutes, because after that you will cook it a second time in the pan with the onions, chiles and chorizo. If you want to add some tomato, you can add it after the chorizo is cooked and before you add the potatoes. Your dish will also be delicious.

I hope you try this recipe and find many uses for it. I am heading to the kitchen to make myself a taco of papas con chorizo and scrambled eggs!
Buen Provecho!

Papas con Chorizo
Potatoes with Chorizo

2 medium white or yellow potatoes, scrubbed and cut into 1/2” dice (about 2 1/2 cups)
2 Tbsp vegetable oil or manteca
1/2 cup white Spanish onion, cut into 1/4” dice
1 Jalapeño chile, minced
120g raw Mexican chorizo
Salt and black pepper to taste
¼ cup chopped cilantro

In medium saucepan, place potatoes and 1/2 tsp salt. Cover with water. Bring to a slow boil over medium heat and cook for 10 minutes (start counting when you first put the pan on the stove). They will almost be fully cooked at this point. Drain potatoes and reserve.

In large frying pan, heat oil and cook onion and Jalapeño until soft and translucent.  Add chorizo and break apart using the back of the spoon. Cook until chorizo is starting to get golden, 5-10 minutes.

Add drained potatoes and a bit of salt and pepper and mix really well. Cook, stirring often, until potatoes are fully cooked. If you feel your mixture is sticking to the pan, add a bit more oil.

Adjust seasoning and when potatoes are soft, add chopped cilantro.

Serve immediately.

Serves 4.

Comment

Enchiladas Potosinas, so simple but so delicious!

February 20, 2022 Maria Garza

I first tried Enchiladas Potosinas at my cousin Geraldina’s home in San Luis Potosí in central Mexico. Nowadays, they are a staple in the San Luis kitchens, often served for simple, easy dinners. You can buy them at grocery stores, to be brought home and simply griddle-fried and served for a very quick and satisfying meal.

But it was not always so… Enchiladas Potosinas came about - as the story goes - as a happy accident. It was in the early 1900’s when Doña Cristina Jalomo, from a small town called Soledad on the outskirts of San Luis, went to the local mill to grind corn for masa for making tortillas. When the miller handed her the masa she noticed it was tinged red and when she asked why, she was told they had ground dried cascabel chiles beforehand, and that’s why her masa turned red. Doña Cristina was not too impressed, but she was not about to waste, and she used that red tinged masa to make tortillas for her family. When they tasted these red tortillas, they all agreed they were delicious, so from then on she requested her masa be ground with chiles.

She went on to create her signature enchiladas with that red masa, for sale in a stall in the town plaza on Sundays and holidays. Doña Cristina and her Enchiladas became famous, so much so that her dish is now one of the most iconic dishes of the State of San Luis Potosí - her daughters registered the dish in 1965 and it is now an icon. What Doña Cristina created continues to be a family business, with her grandson carrying on her legacy to this day.

The name Enchilada refers to the fact that the masa has chiles in it. These are a bit different to the other types of enchiladas that are typically covered in sauce. In this case, the chiles are IN the masa, and it flavours it in a subtle and delicious way.

To make this masa, we have to rehydrate guajillo or cascabel chiles, then blend them and add that chile paste to the masa. After that, we can make these enchiladas, or use the masa to make “red tortillas”, or “tortillas enchiladas” that can be used to make other types of enchiladas or simply used as they are. The masa itself is a dream to work with and it makes very pretty and colourful tortillas. But the focus of or story today is Doña Cristina’s enchiladas, so let’s get back to the story.

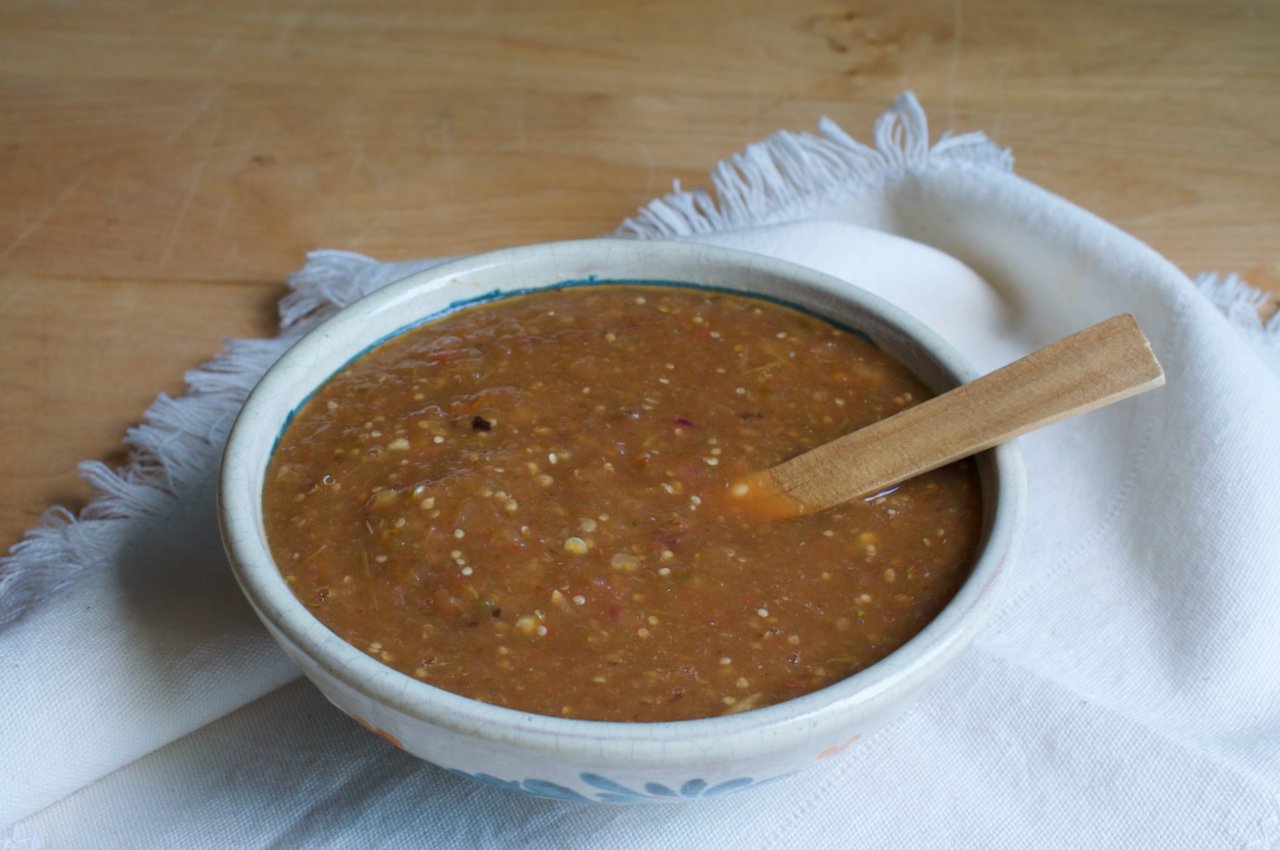
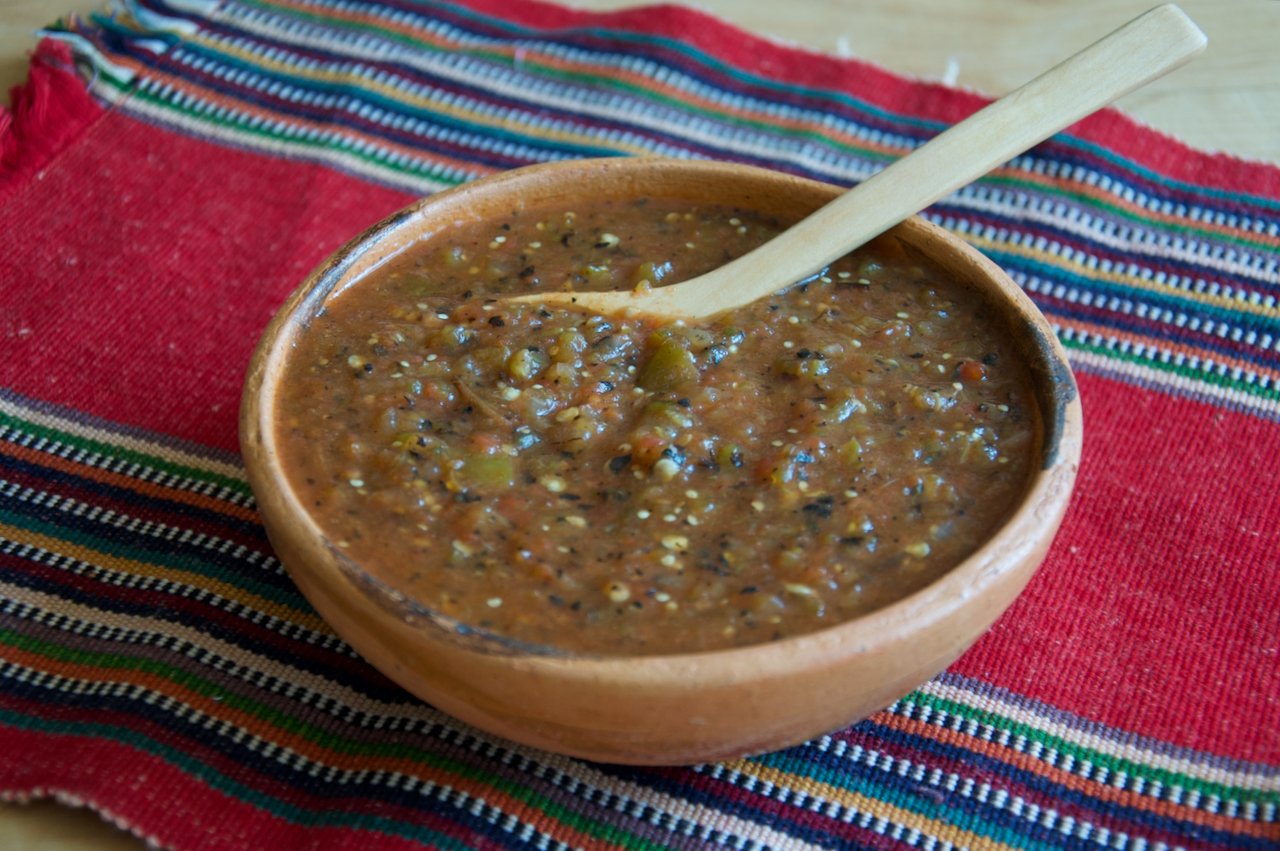
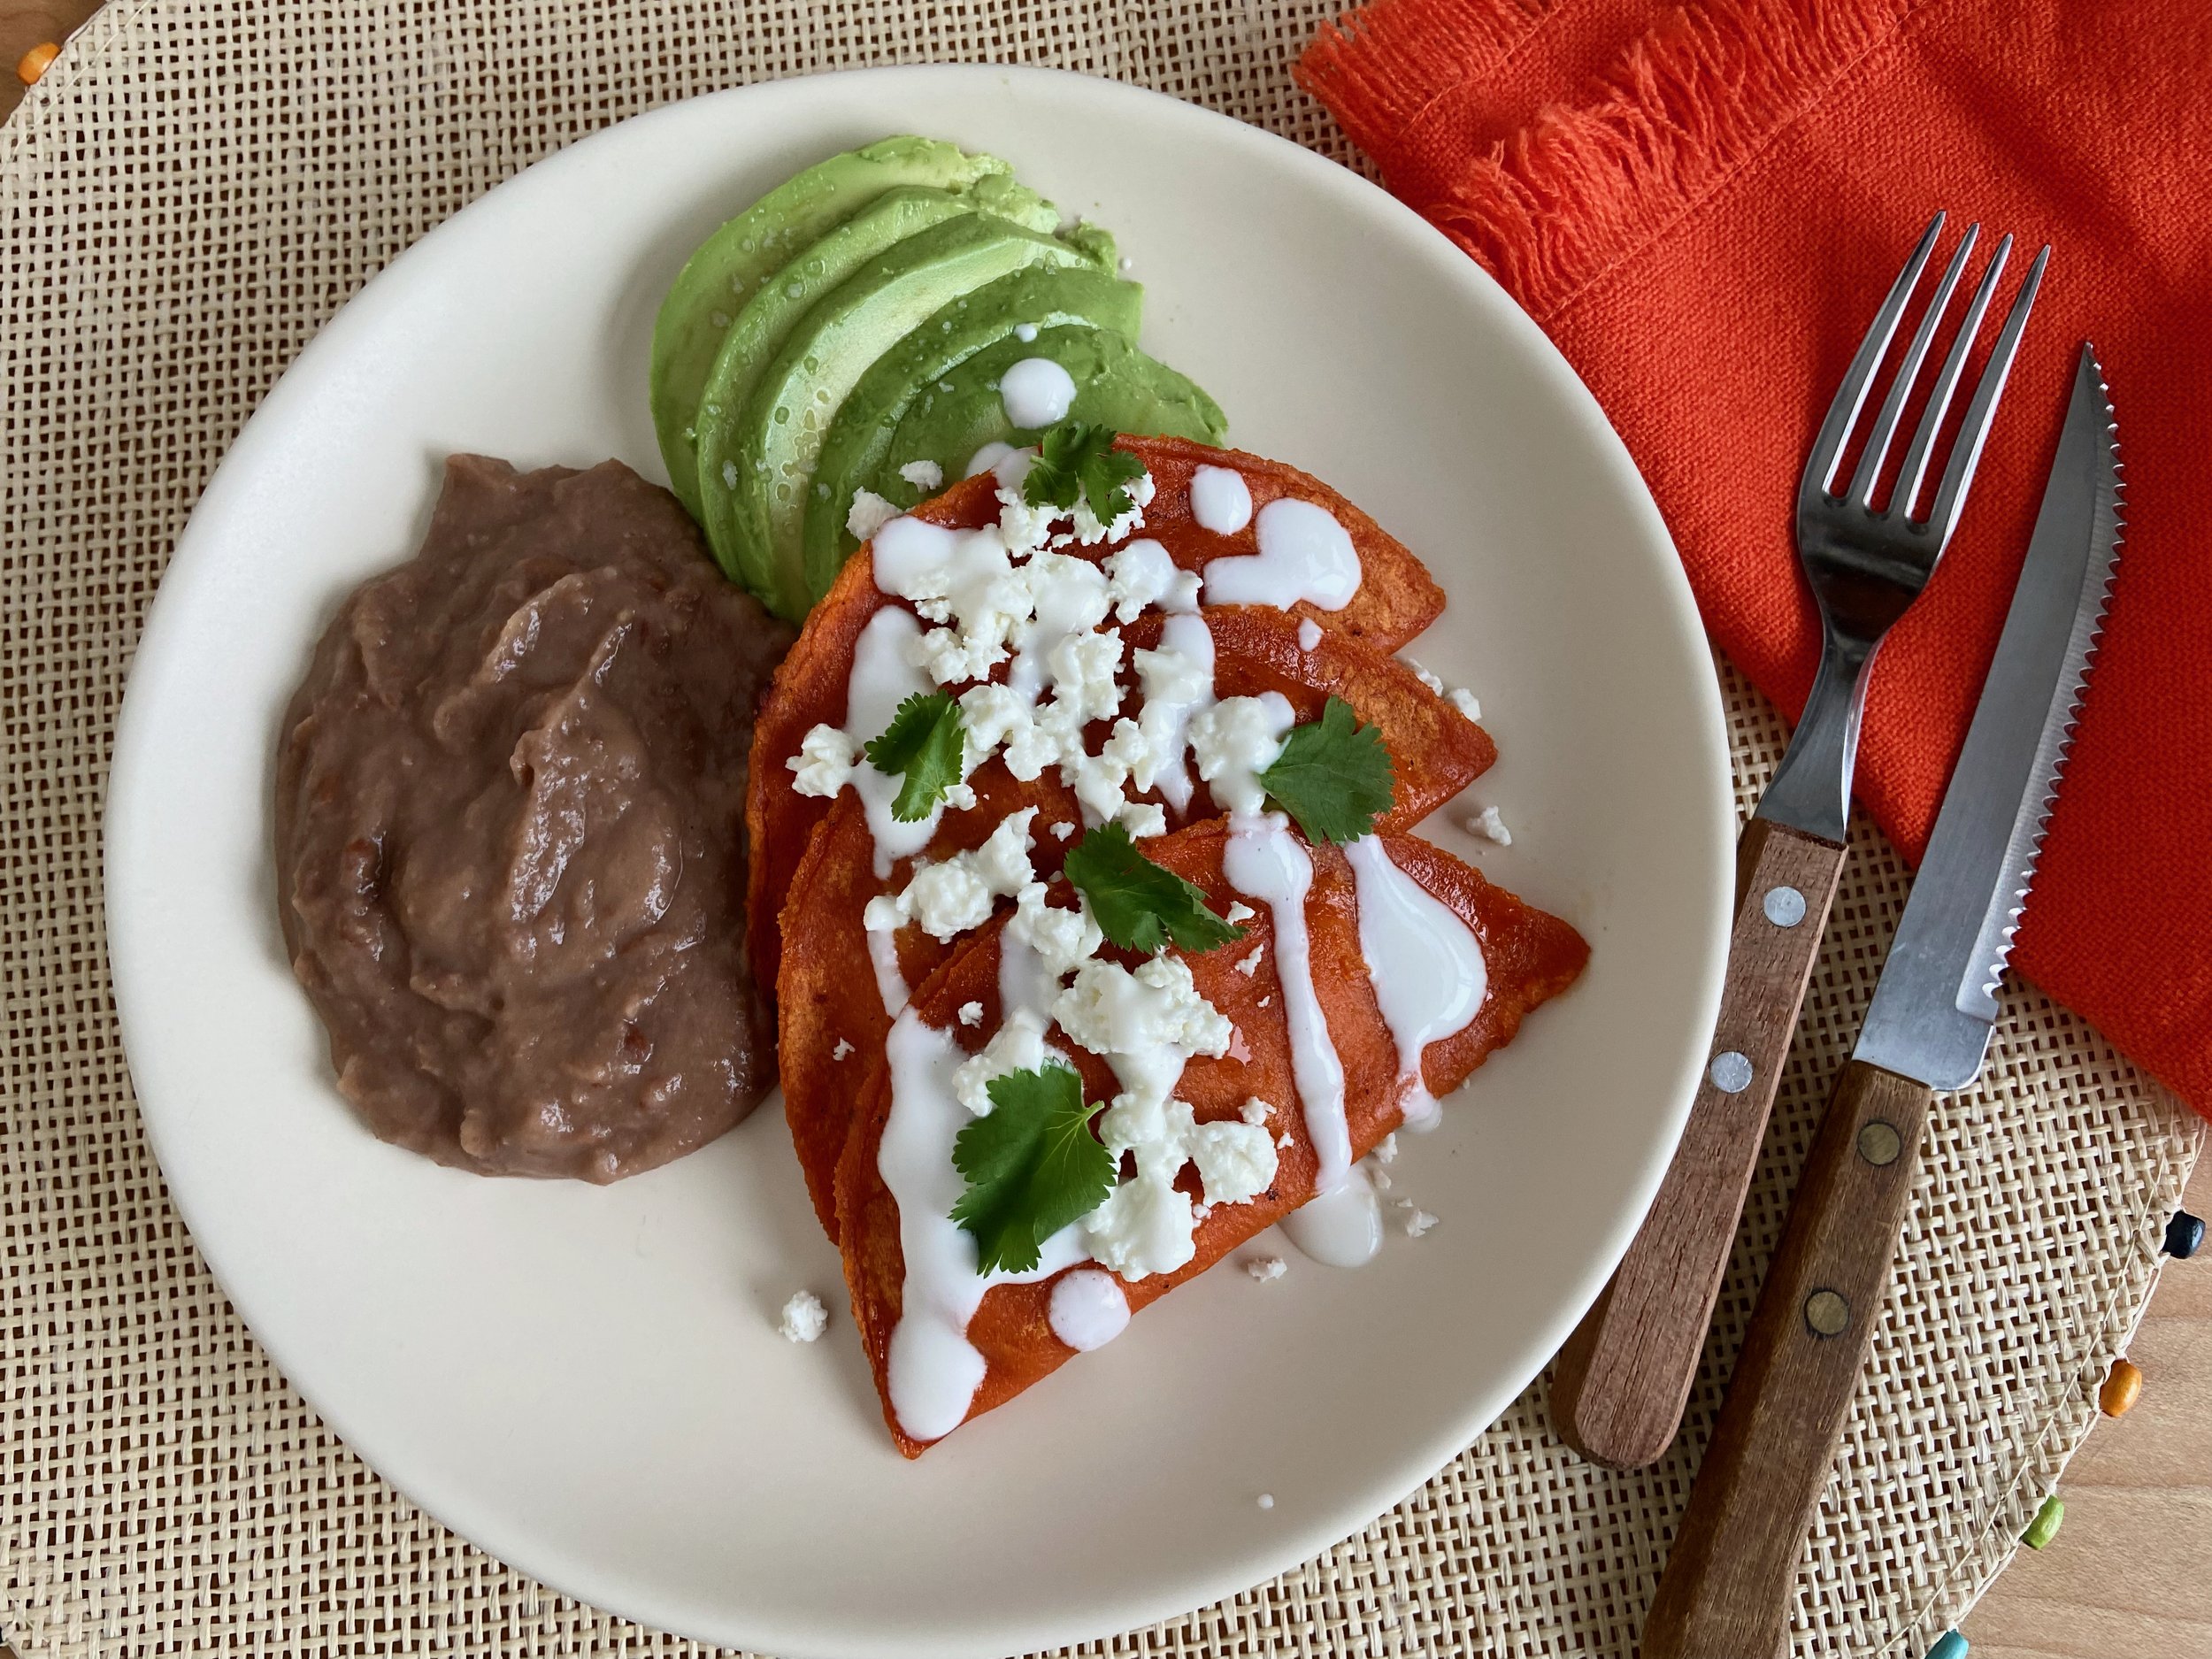
Doña Cristina decided to make a type of quesadilla, but the filling is a delicious salsa and cheese combo. It’s like these enchiladas are flavoured from the inside out! A thick salsa is mixed in with crumbled cotija cheese, then it’s added to the tortilla as it bakes on the griddle. As the tortilla cooks on the griddle, while it’s still raw, you mound some filling on it, fold it over and press the edges to seal. Since the tortilla is still uncooked, the edges seal very nicely with the help of a spatula. Then you continue to cook it and that is that. You can make a lot and reserve, or you can freeze them and have them handy for a dinner emergency.

A few things you can make ahead: you can make the masa a day ahead and keep refrigerated until ready to use. You will have to knead it again until soft and pliable before using. You can make the salsa 2-3 days ahead and keep refrigerated until ready to use, or you can use any other salsa, as long as it is not runny.

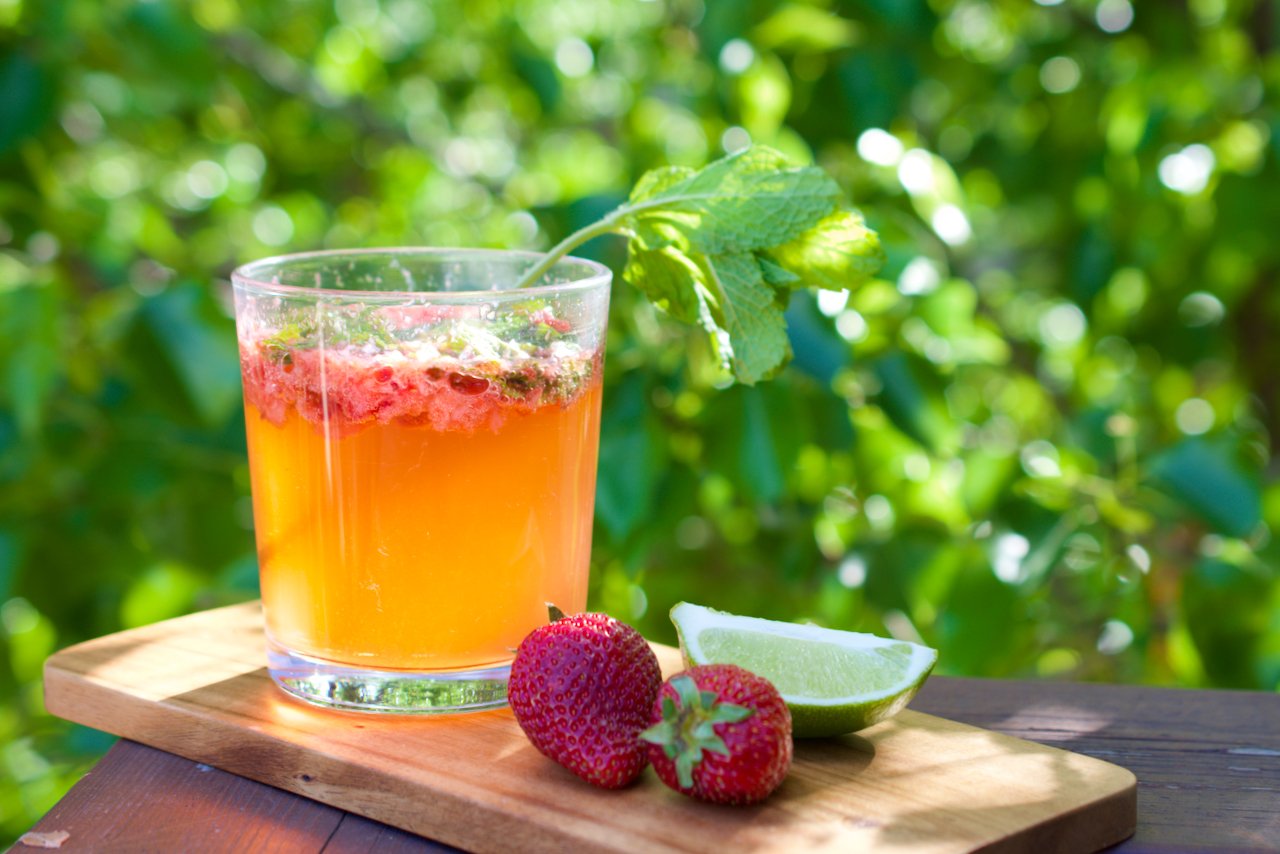
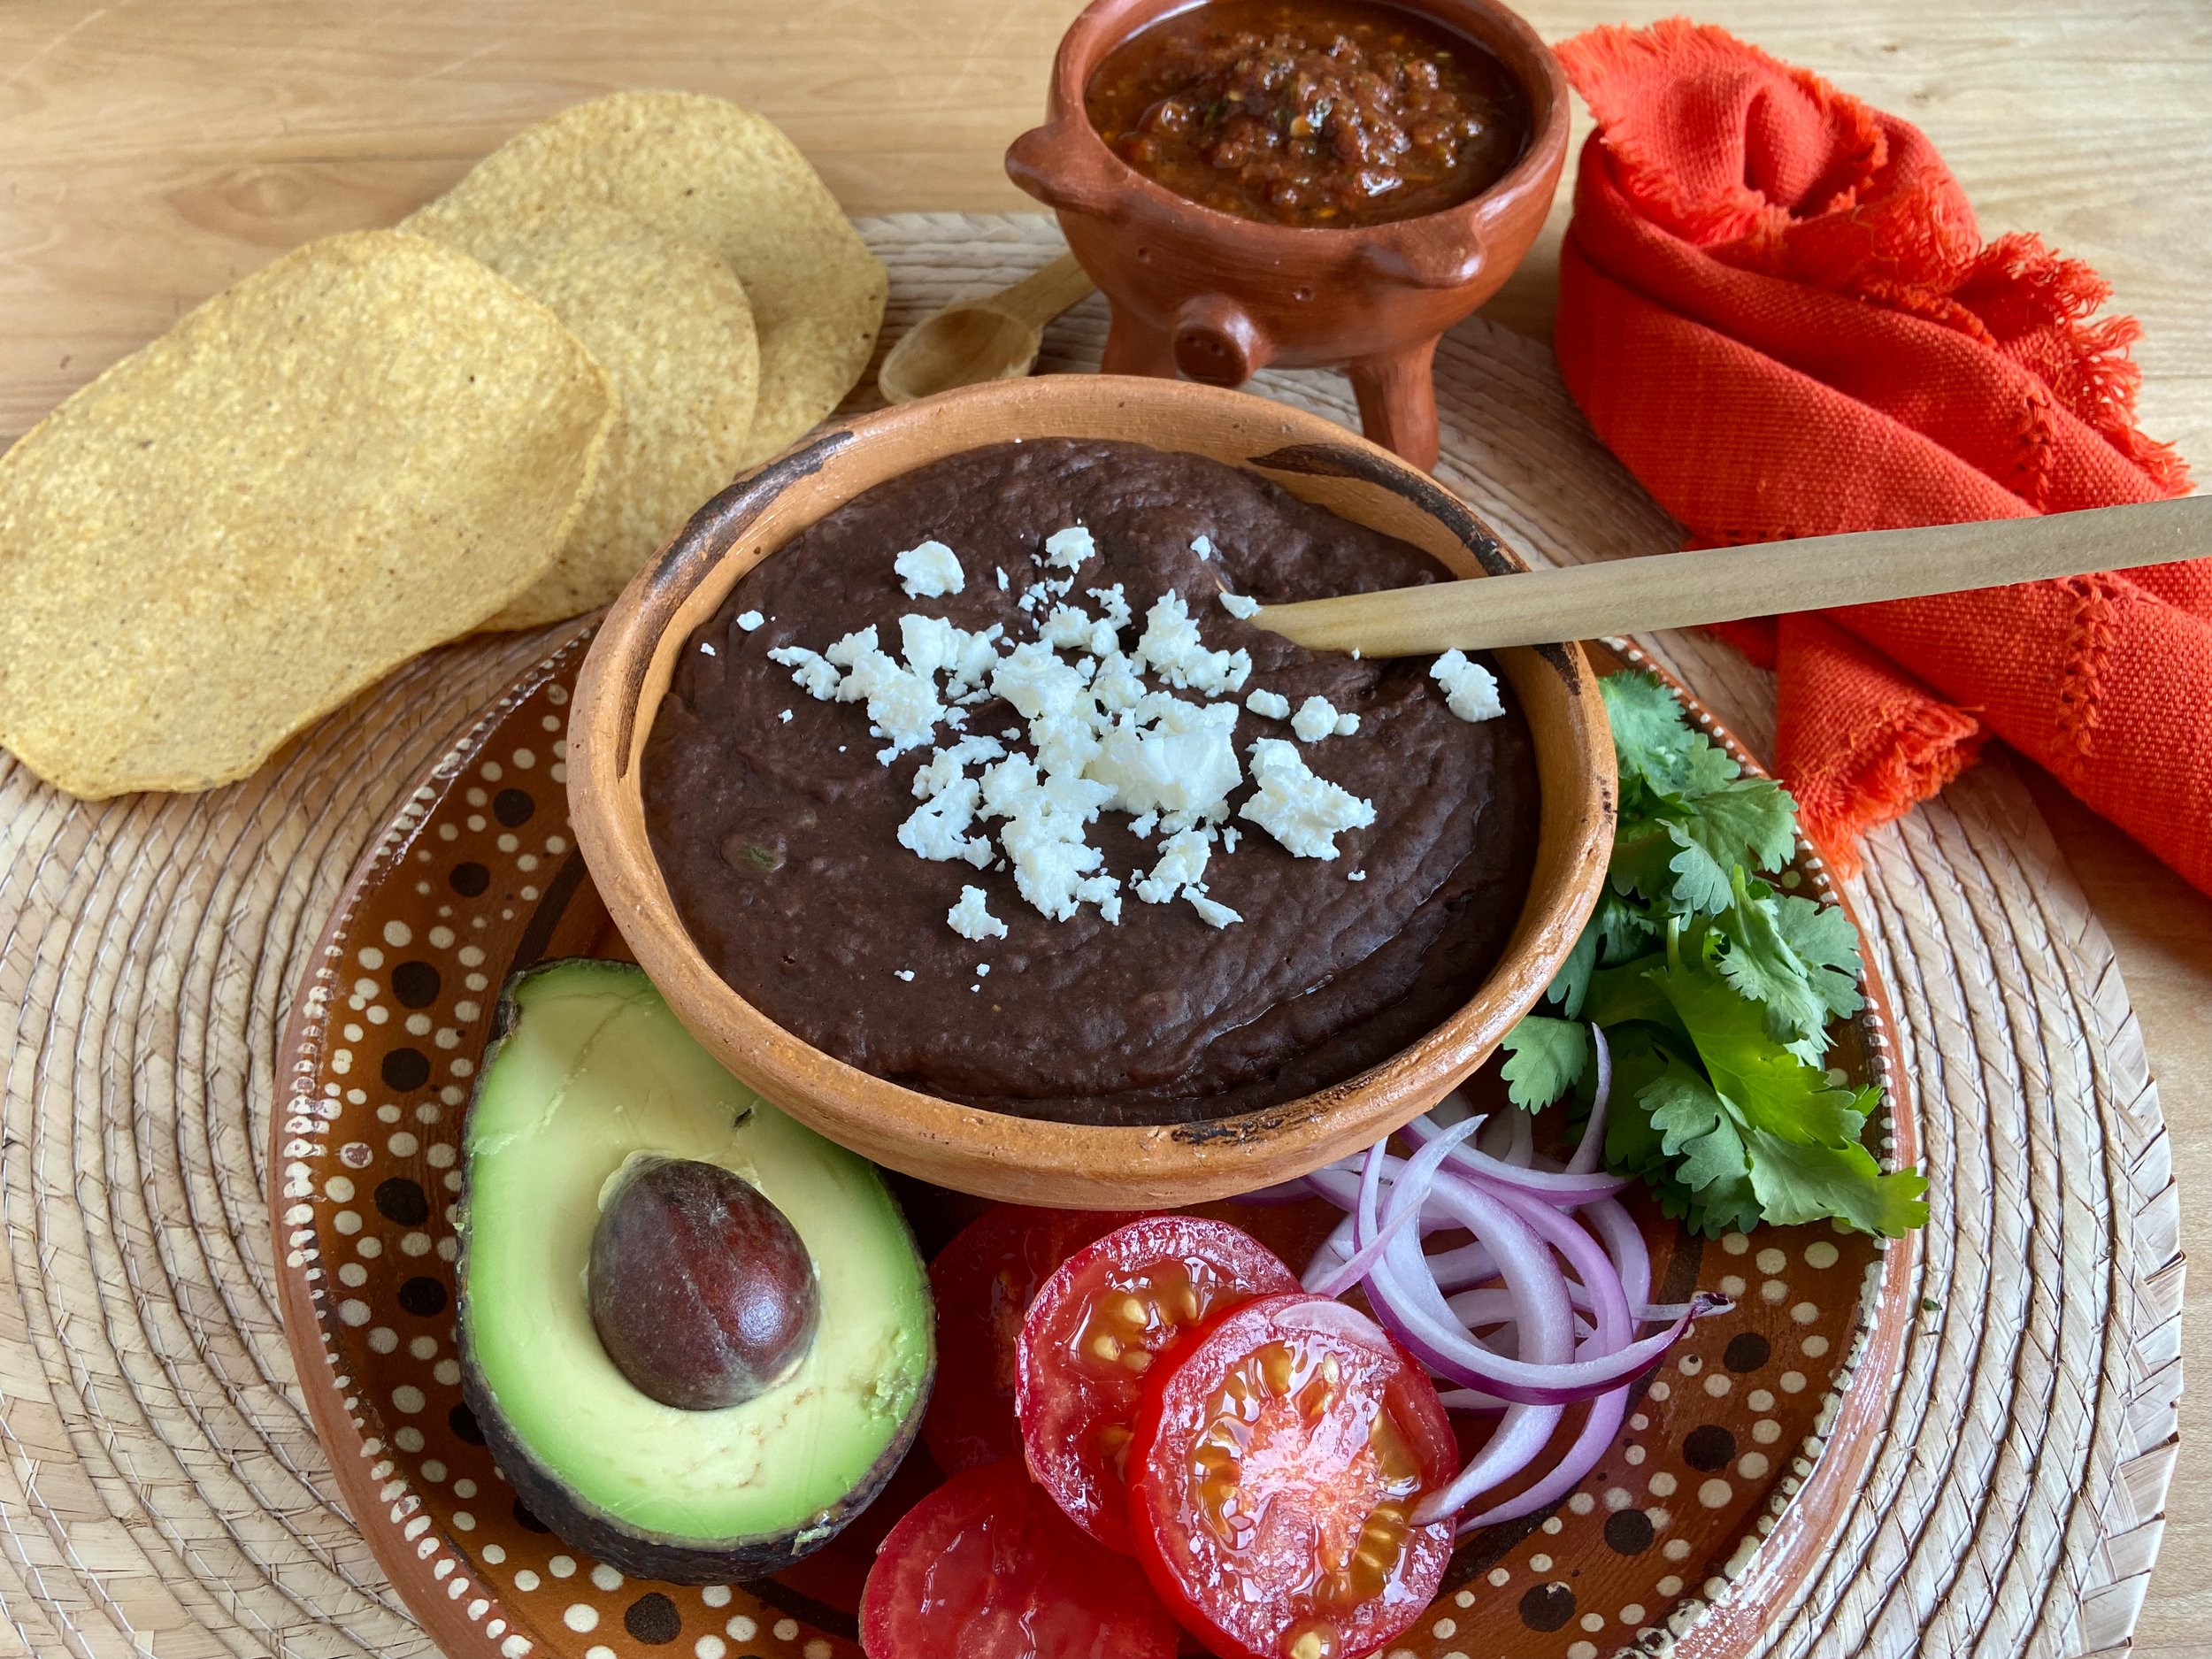
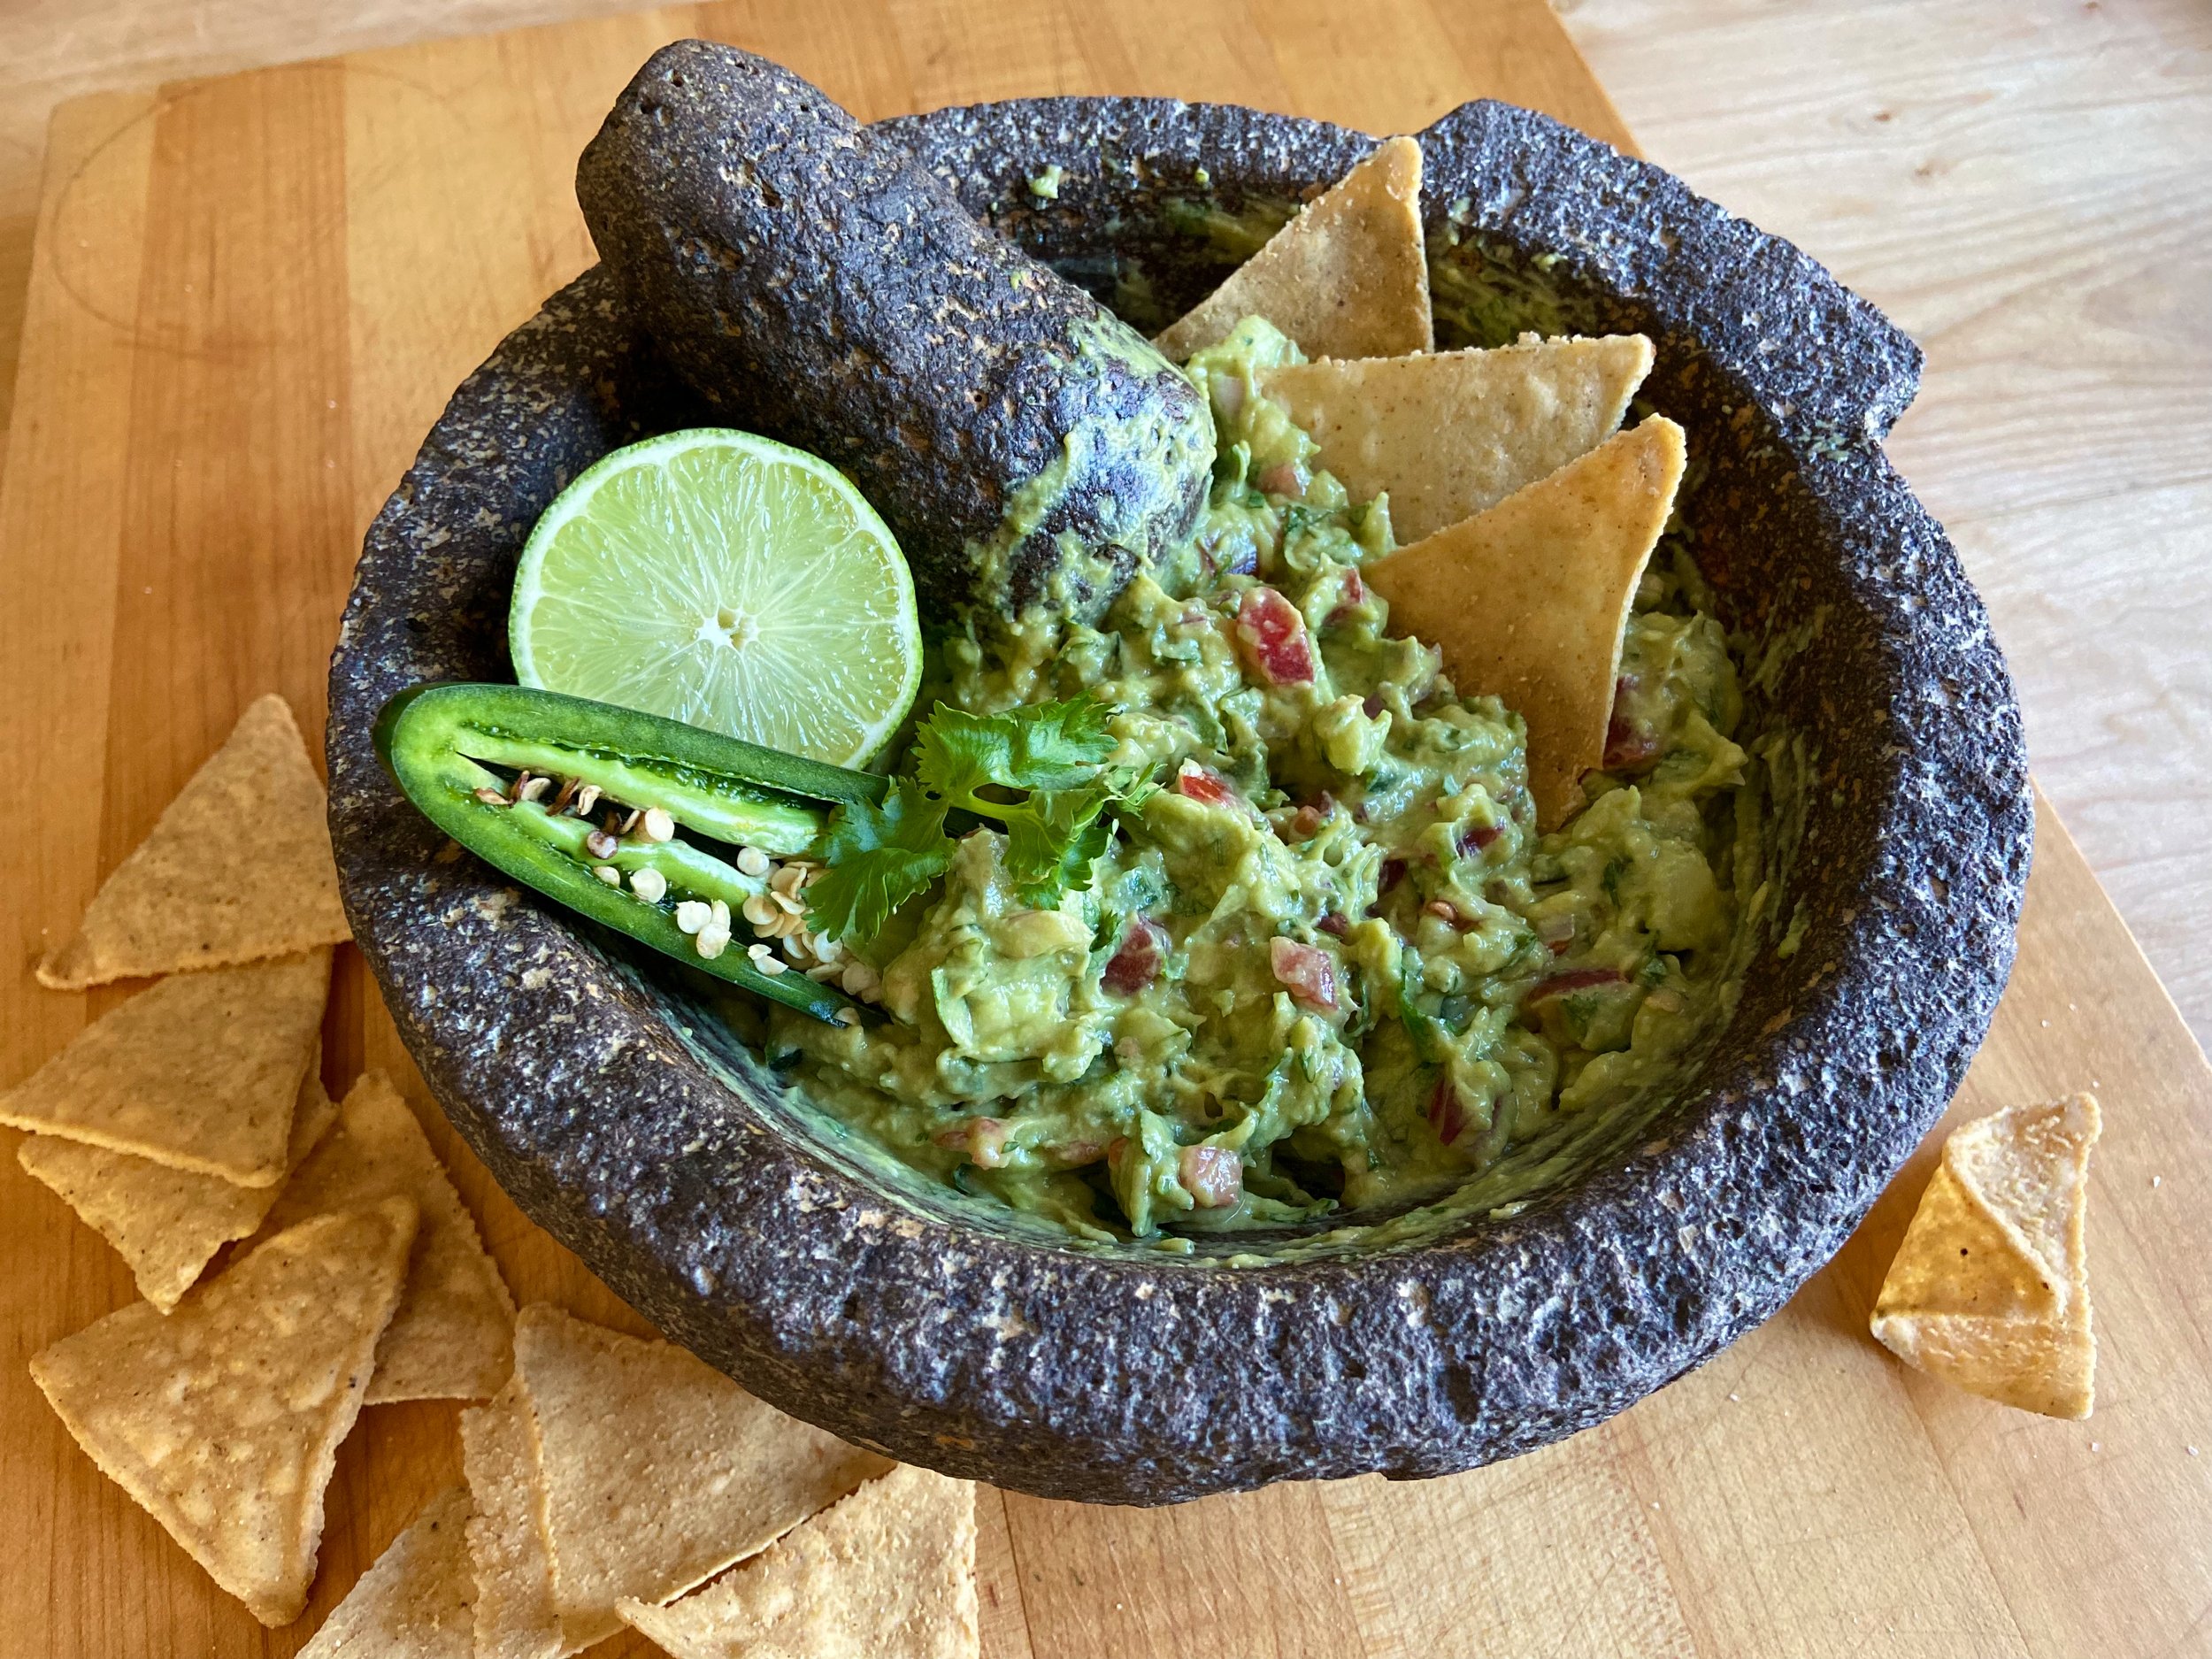
To finish, the quesadillas are pan-fried and simply served with a drizzle of crema and a bit of additional cheese as a garnish. Usual sides are avocado and beans. So simple but so delicious! I hope you give this a try!

ENCHILADAS POTOSINAS
Cheese and Salsa Filled Enchiladas from San Luis Potosí

For the Masa Enchilada:
2 cups Maseca corn flour
1 1/2 cups warm water
1 tsp kosher salt
4 dried guajillo chiles, stemmed and seeded
1 small garlic clove, peeled

For the Salsa:
3 Roma tomatoes
1-2 Jalapeño or Serrano chiles
1 garlic clove
1 wedge onion (about 1/3 cup)
1 tsp oil

For the Enchiladas:
650g Masa Enchilada
150g Cotija or dry (and not too salty) Feta cheese, crumbled (or a mixture of cotija and queso fresco)
1 cup Salsa

To serve:
1 cup crema, crème fraîche or sour cream thinned with a bit of milk
1/2 cup crumbled cotija, feta or queso fresco
Cilantro leaves for garnish
Refried Beans and Avocado slices

To make the masa, place Maseca in large bowl and add warm water as you mix to make a fairly dry dough.
In the meantime, in medium saucepan, bring 4 cups water to a boil. Add cleaned guajillo chiles and simmer for 15 minutes, until completely soft and pliable.
Remove chiles from water and place in blender with 1/4 cup of the cooking water. Blend until completely smooth and then strain through a fine sieve to obtain a smooth puree. You should have about 1/2 cup.
Add chile puree to masa and wearing gloves, work it in. You may have to add up to 1/4 cup additional water, 1 tablespoon at a time, until you have a soft and smooth dough. Cover and let rest while you make the salsa and filling.

To make the salsa, in a medium saucepan, place tomatoes, chiles, garlic and onion and cover with water. Bring to a boil and then simmer for 5 minutes, just until vegetables are soft. Remove from water and blend. I like the mixture a bit chunky.
Discard water and in the same saucepan, heat 1 tsp oil. Add salsa and cook at medium low heat until salsa thickens. There should be no moisture left. This could take 15-20 minutes. Cool completely.

To make the Enchiladas:
Preheat comal or cast iron griddle over medium heat.
Make small balls of masa, about 30g each, and keep covered in bowl as you work.
Press dough balls on tortilla press between two sheets of plastic, as if you’re making tortillas. Working with one at a time, place pressed masa on griddle and wait for 1 minute. Place about 1 heaping Tbsp filling on one half of the tortilla, leaving 1” edge. As soon as the tortilla releases from the comal, use your spatula to fold the tortilla over the filling and immediately press on the edges with the spatula, to make sure it’s completely sealed. It is very important to do this while the dough is still raw, or else it won’t seal.
Continue to cook, flipping every minute or so, until tortillas are cooked, about 4-5 minutes per side. Remove to a tea towel lined rack. Continue making enchiladas until you have used up all the filling.
* You will have a bit of masa leftover, so you can make a few tortillas for snacks later.

To serve, in griddle or large cast iron frying pan, heat 2-3 Tbsp oil. When it’s hot, fry enchiladas until golden and crispy. Drain on paper towels.
Serve immediately, garnished with crema, crumbled cheese and cilantro leaves.

Makes 12-14 enchiladas.


Comment
← Newer Posts Older Posts →

Copyright © 2025 The Cultural Kitchen
All Rights Reserved

1936 Ranchwood Way Orleans, Ontario K1C 7K7
613.762.0940