Born and raised in Mexico, and having left my country more than 20 years ago, I am proud to say I still cook like I ate when I lived in Monterrey.
The Mexican diet has historically consisted of beans, corn, pumpkin, tomatoes and chiles: all vegetables that grew in the "milpa", or vegetable parcel. Not everyone could afford much meat or cheese, but beans and corn were - and are - very affordable. Best of all, beans are full of protein and fibre, and are very good for our bodies.
Because beans are so common, we are very creative on the ways to cook and eat them. After all, no one wants to eat refried beans every day of the week! Mexican cooks are very good at presenting the humble legume in different guises for lunch or dinner on a daily basis.
One of the most delicious ways to make soup is to turn the vegetables into a cream, and this recipe is a very good example. It is also popular with picky children who turn their noses up at the sight of mashed beans.
You can make this soup with canned beans, though I highly recommend making a large pot of beans yourself. It is much cheaper and infinitely healthier. This recipe uses evaporated milk for a creamy texture and mouthfeel; if you prefer, you can substitute whipping cream instead, but I don't find it necessary.
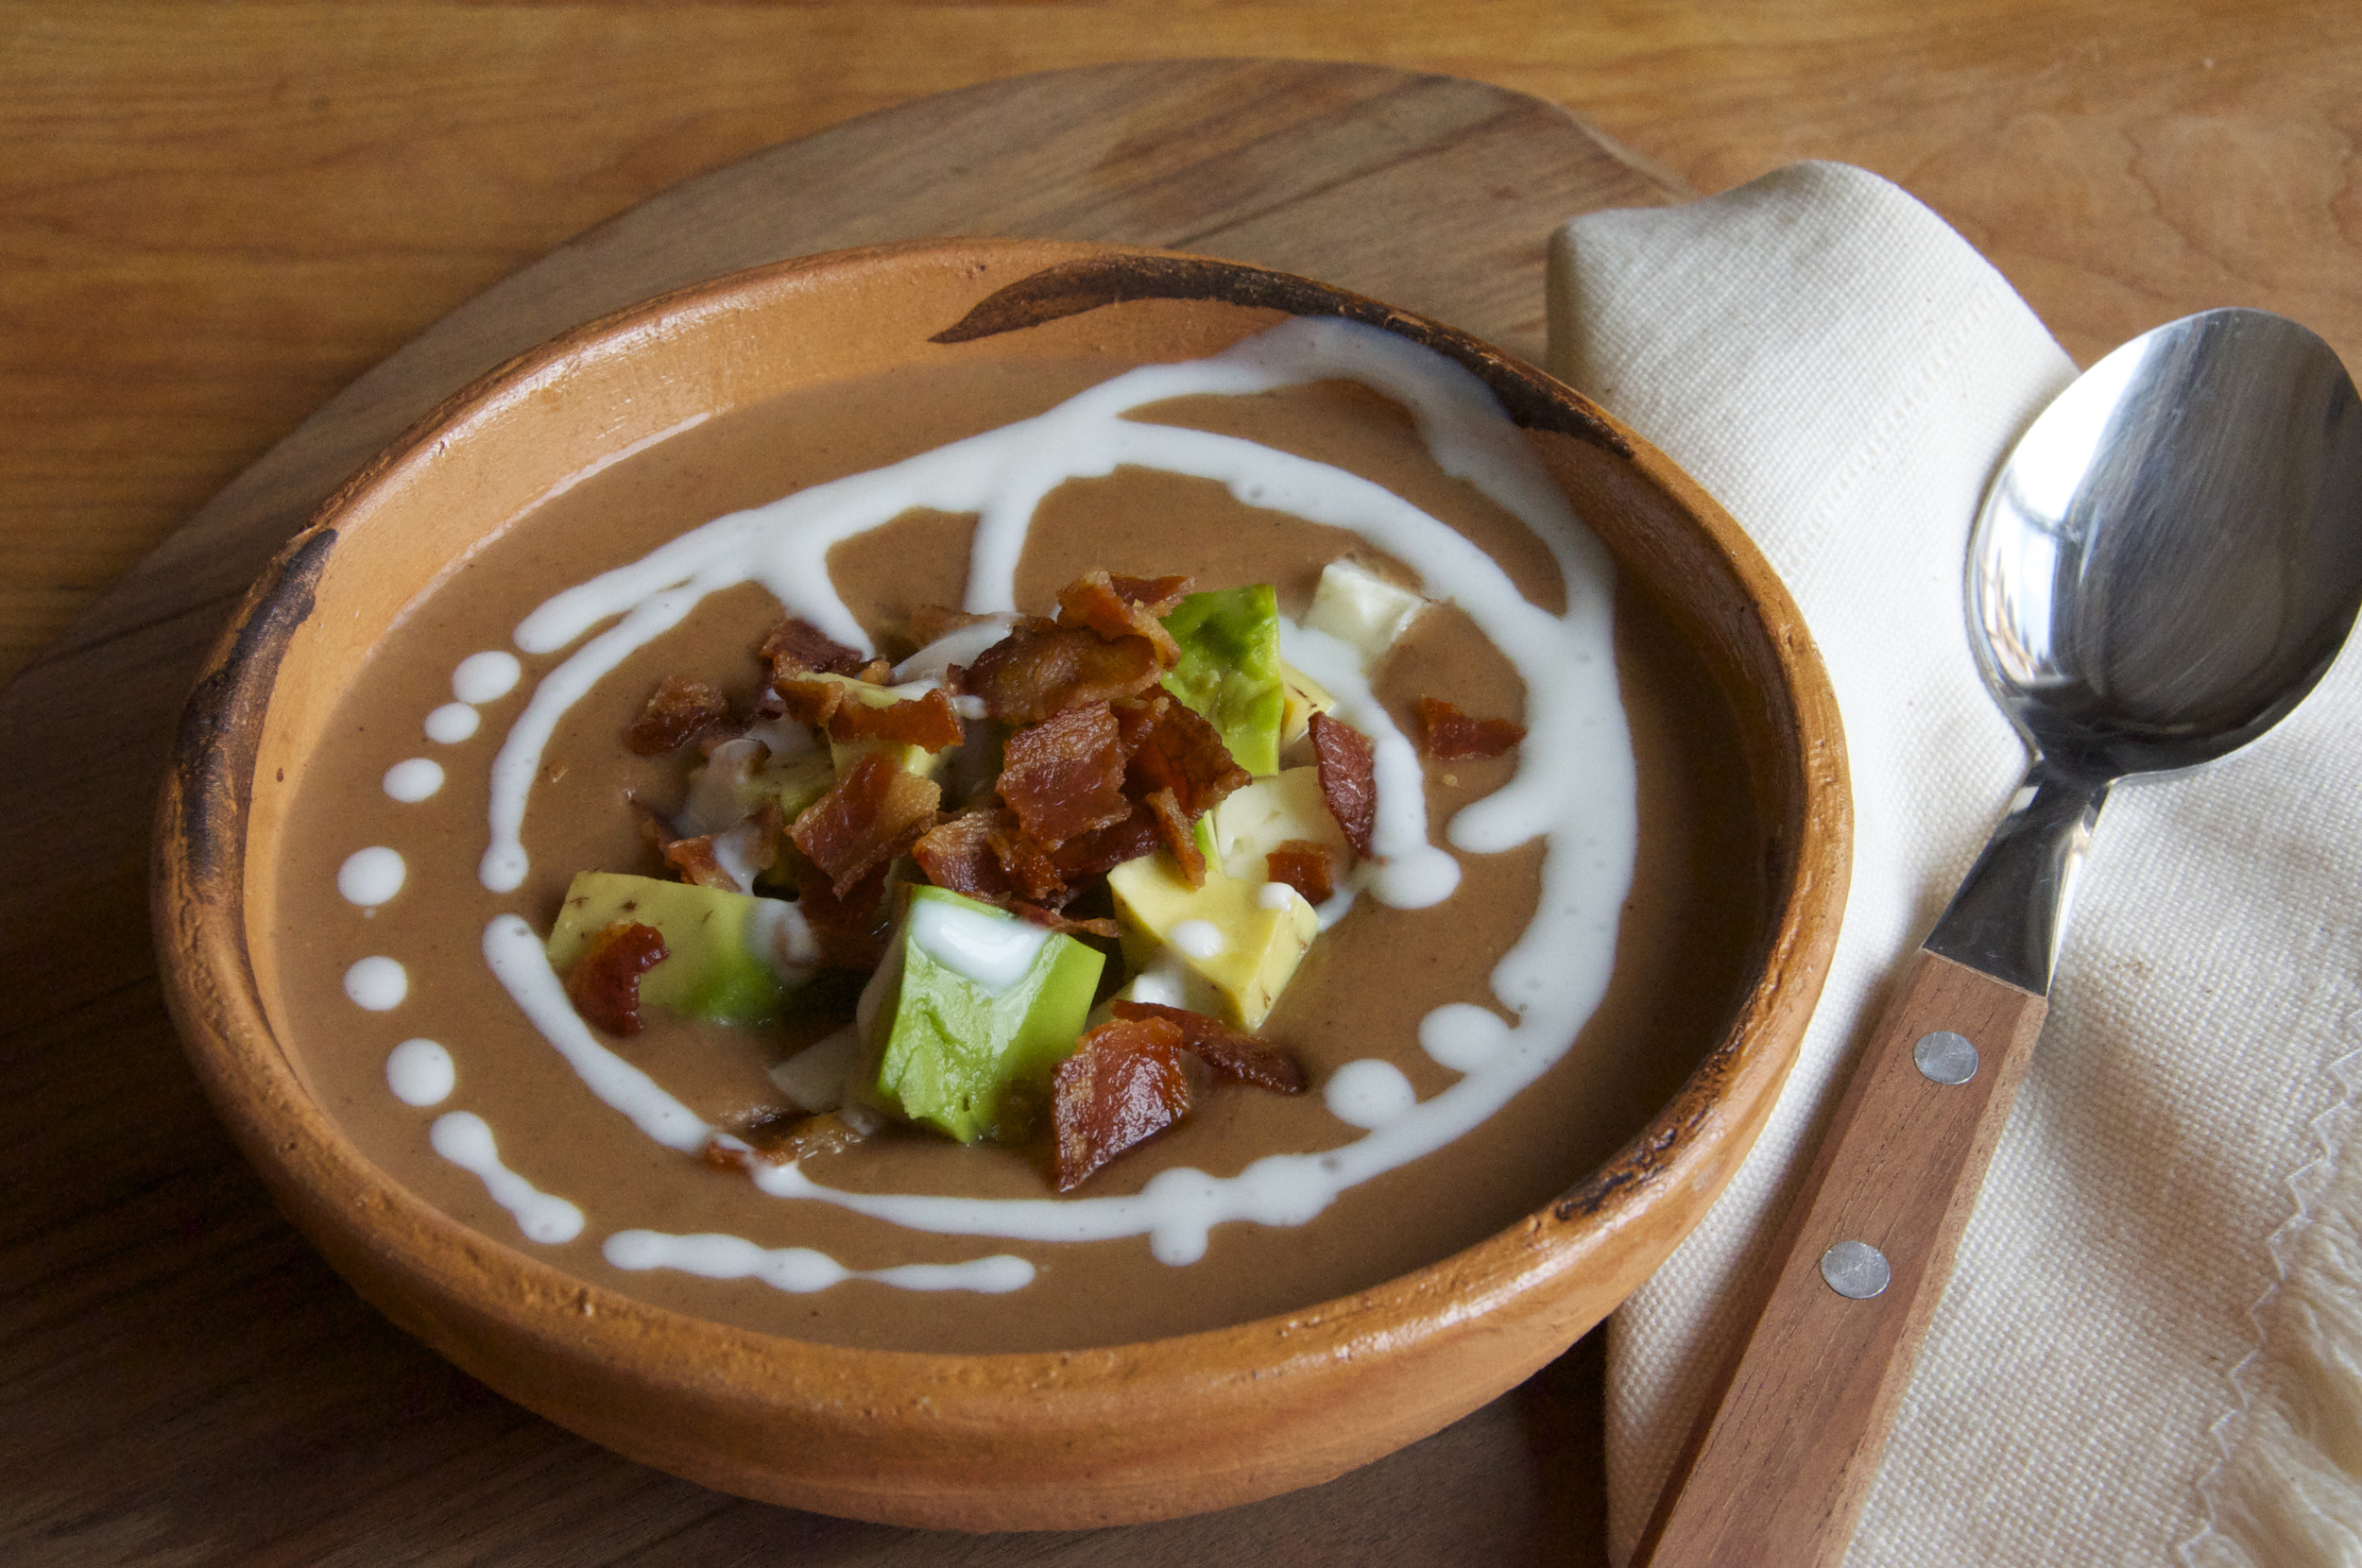
Like all Mexican soups, a very important part of the recipe is the garnish, and in the case of this soup, it is an essential part of the dish. Bacon bits add a rich meatiness, while the cheese gives a salty tang. The avocado adds a buttery softness and the crema brings everything together.
I hope you make this soup. It makes the perfect lunch or starter for dinner.
Cream of Pinto Bean
5 cups cooked pinto or black beans, with 1 cup of their broth
1 medium onion, diced
2 cloves garlic, chopped
1 roma tomato, diced
2 sprigs fresh epazote, or ½ tsp dried
¾ cup evaporated milk
1 tsp ancho chile powder
1 Tbsp lard or vegetable oil
½ tsp kosher salt, or to taste
Garnish:
1 avocado, cubed
½ cup fresh, feta or panela cheese, cubed
½ cup crumbled cooked bacon or chicharrón
½ cup crema
In medium saucepan, heat 1 Tbsp lard or vegetable oil. Cook onion over medium high heat for a few minutes, or until it starts to brown on the edges. Add garlic and cook for another minute. Add tomatoes and cook for 5 minutes, or until they become saucy. Transfer mixture to blender container and add beans and their broth. Blend until completely smooth, adding more bean broth or water if needed to make mixture blend properly.
In same saucepan, cook bean mixture over medium heat, adding epazote, ancho chile powder and salt. Bring to a boil and then turn heat down to simmer and cook, uncovered, for 10 minutes, to allow flavors to blend. Add evaporated milk and simmer for 5 minutes more. Taste for seasoning and add more salt if needed.
To serve, ladle soup into shallow bowls and garnish with avocado, cheese, bacon or chicharrón and a drizzle of crema on top.
Serves 4 to 6
This recipe was first featured at www.thelatinkitchen.com